Introduction
In this blog post i’m going to setup a windows server on my local machine which is vulnerable for different types of windows attacks. The main reason for this is to practice some sort of things like setting up an Active Directory environment, Active Directory attacks, Windows privilege escalation techniques, Common misconfigurations and more. Here i will NOT explain too much about how to do an enumeration or attacking, I will just focus on building this local server for practicing in the future, there is a lot of tutorials down there about active directory attacks and techniques so you can go read them and practice on the local virtual machine server we will going to create so you will be able to work with your own hand.
Host System Requirements
Don’t panic we will not going insane here, The machine we are going to make will be straight forward with only one domain forest and only one active directory, just one virtual machine, and you can develop it later and make it much more bigger.
Host Minimum System Requirements:
- 6 GB of RAM
- Core i5 CPU
- A good graphic card “not heavily required but recommended”
We are not going to use too much space to the hard disk.
Local Virtual Server Requirements:
- Virtual Box
- Windows Server 2008
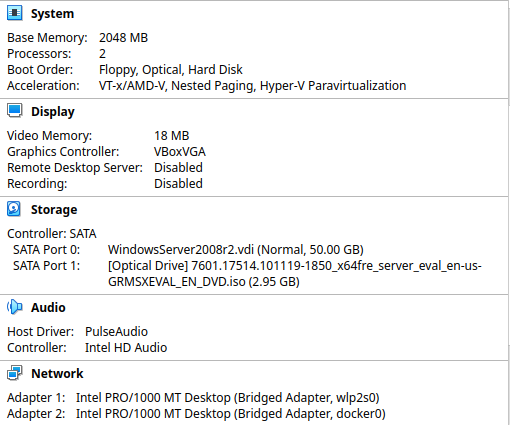
- CPU Cores : 2
- Memory Size : 2048 MB
- File Size : 50 GB
Why using windows server 2008?, I’m using windows server 2008 instead of windows server 2016 because there is a lot of attacking techniques mitigated in windows server 2016 that you gonna miss, Always start with weakest part and go up for higher levels.
Here it is, my final Virtual Box configurations
Now let us start installing our local server.
Initial Installing
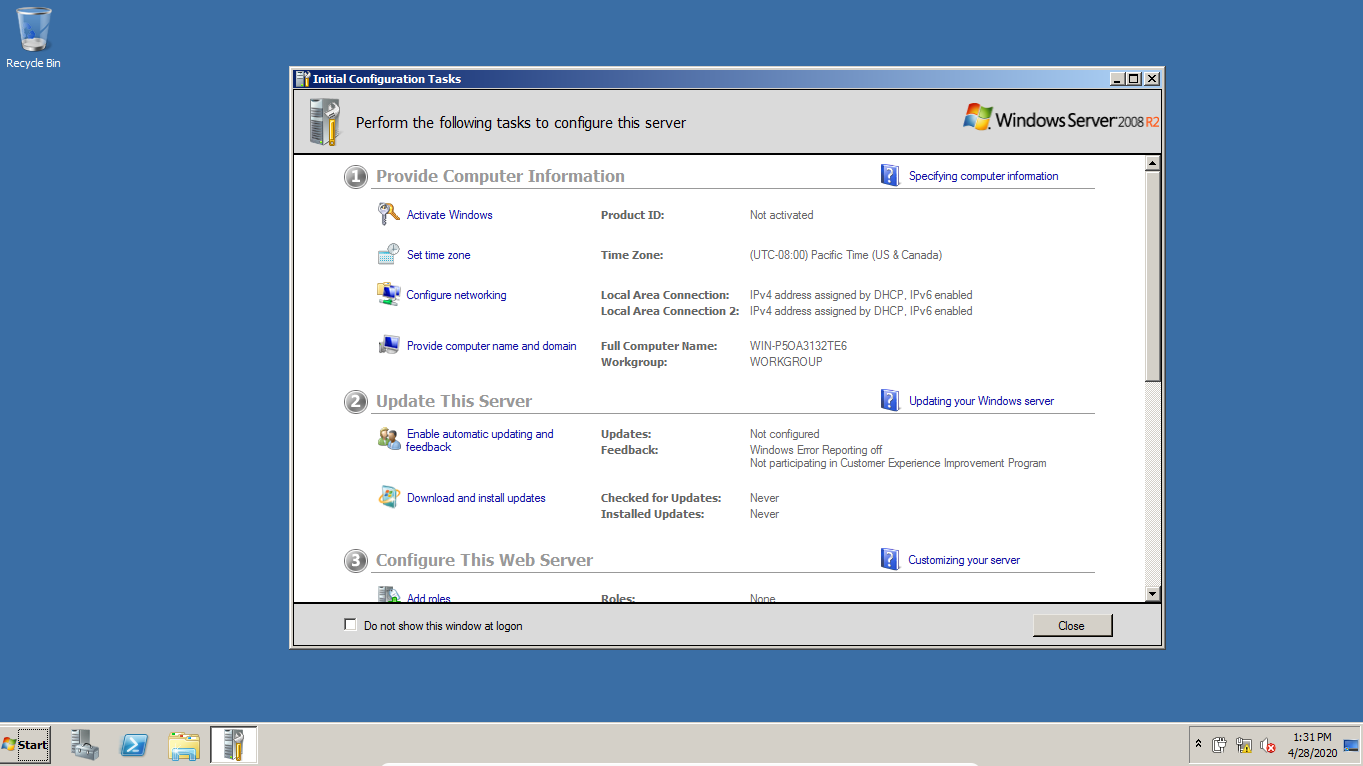
It’s like an ordinary windows installing, so you can go with the Next Next Install thing. And here it is, A fresh install of Windows Server 2008.
Installing Active Directory
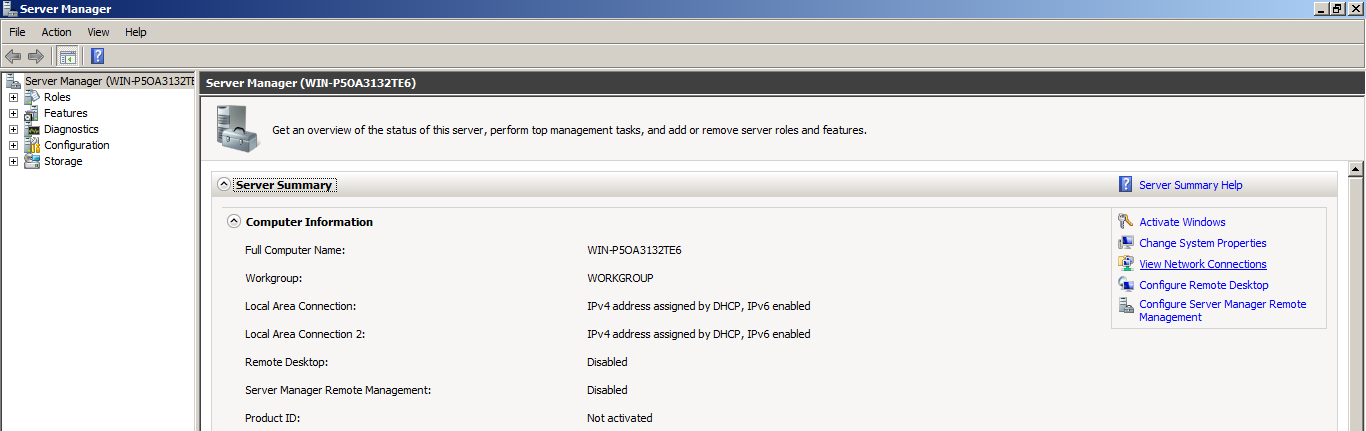
Now lets start with installing Active Directory role, so we going to set this server as a Domain Controller so it’s recommended to give the domain controller a static IP Adress, and then we will proceed to active directory installing.
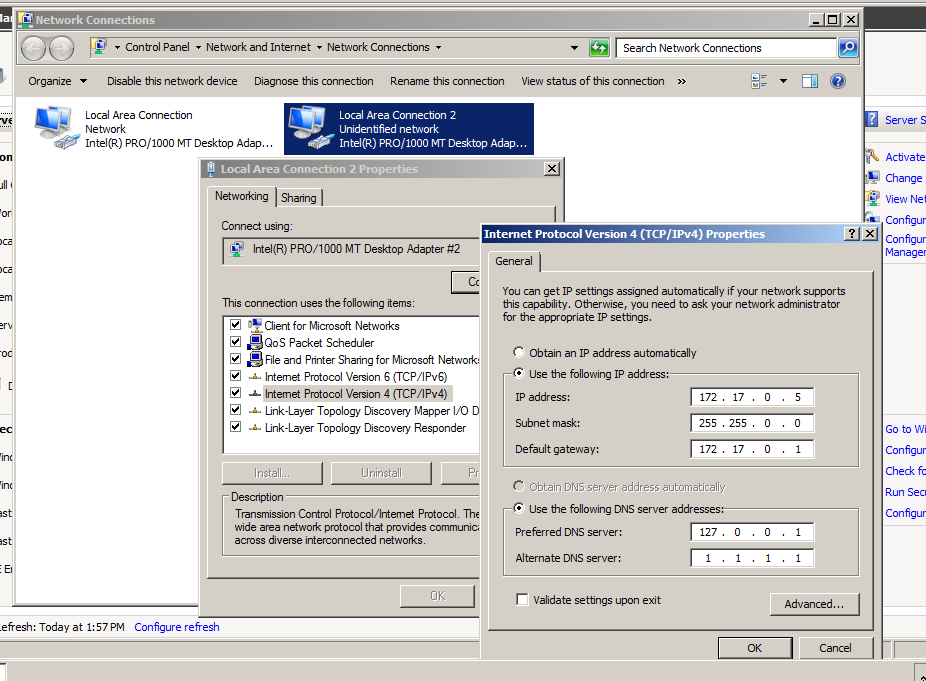
- Start Server Manager and click View Network Connections button.
- Give the Server A static IP Address, Default Gateway
- Notice that we typed at the **Preferred DNS Server** your localhost address, because we gonna set a DNS Server to this server, and used **1.1.1.1** DNS of cloudflare as an Alternative DNS Server, You can use Google DNS if you want.
- Go to Server Manager at Roles tab and click Add Roles
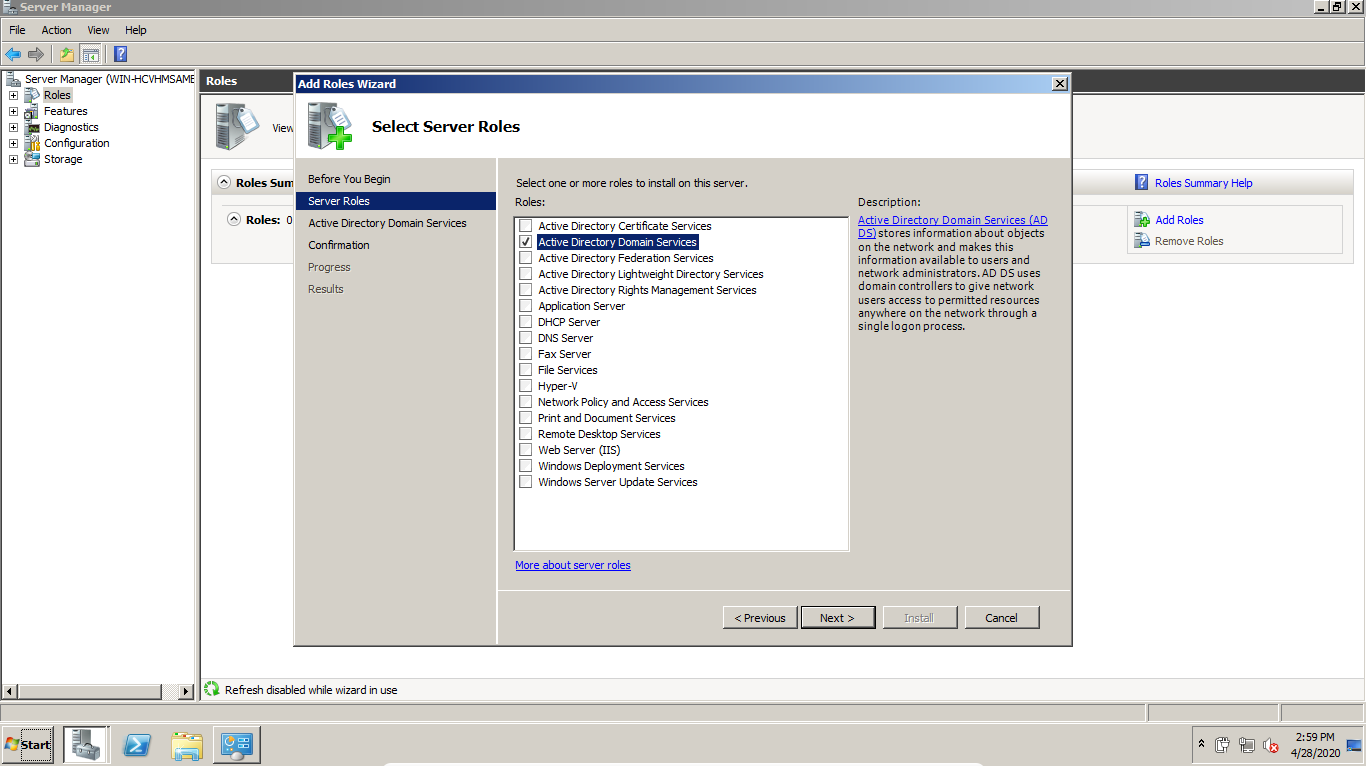
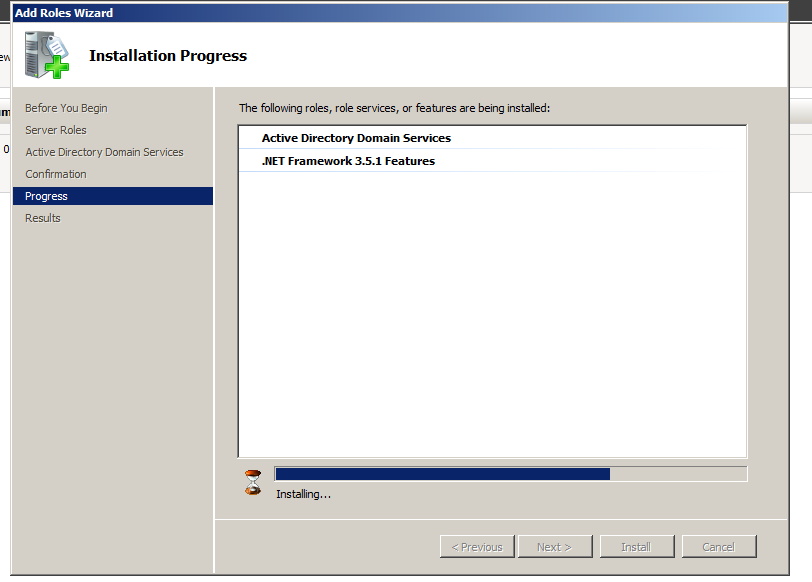
After Next, Next, Install the installation will begin.
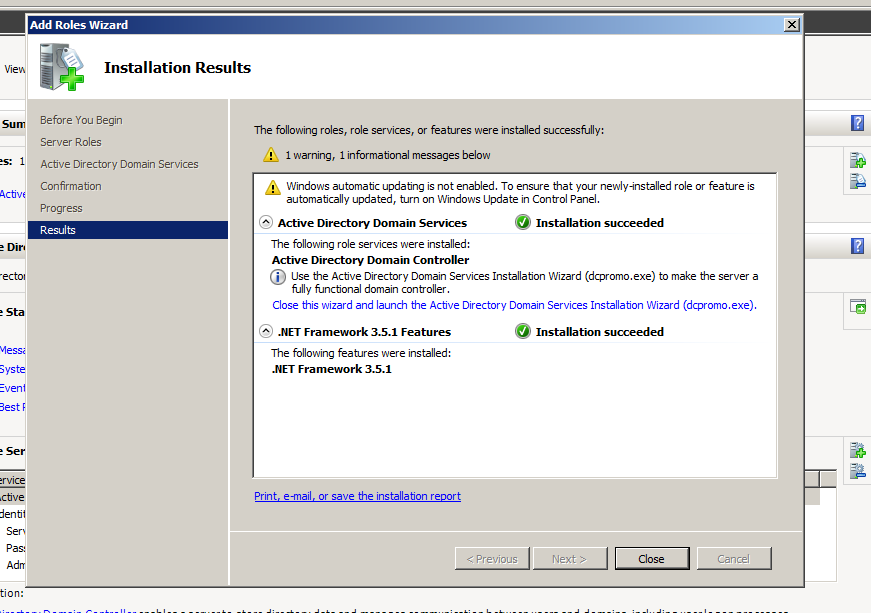
And now the Active Directory Role installed successfully, and reboot the server.
Pay Attention to this message below, this is because the server is not joined a domain yet, We will set the domain controller from there.

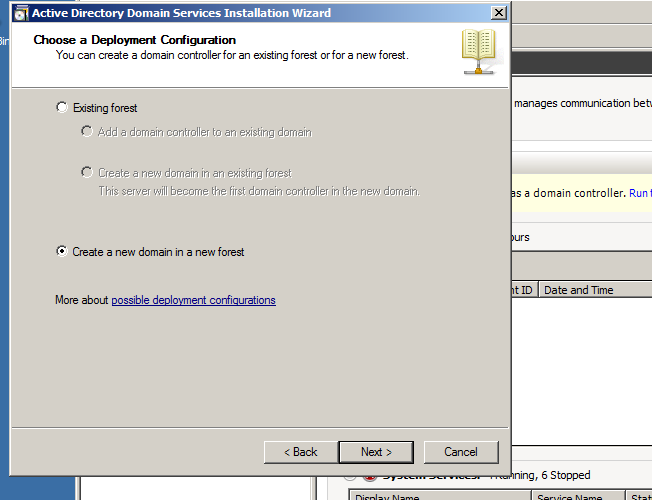
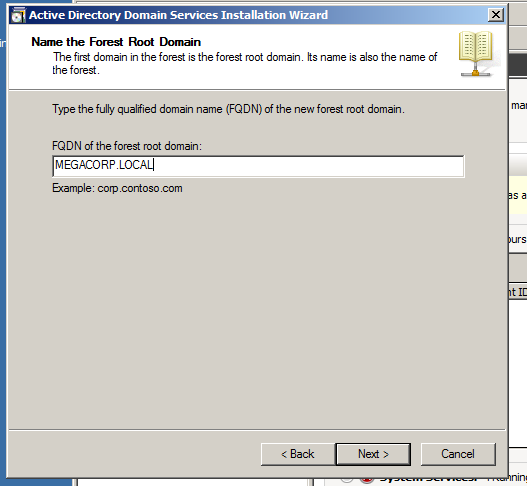
- We will create a new domain in a new forest so you have to choose this.
And type the FQDN “Fully Qualified Domain Name”, The domain name should not look like a real online domain which might interfere with domain controller name, so it’s not recommended to use something that have .com, .net or something similar, I will call it MEGACORP.LOCAL as a FQDN for the server.
Go with the default installation settings.
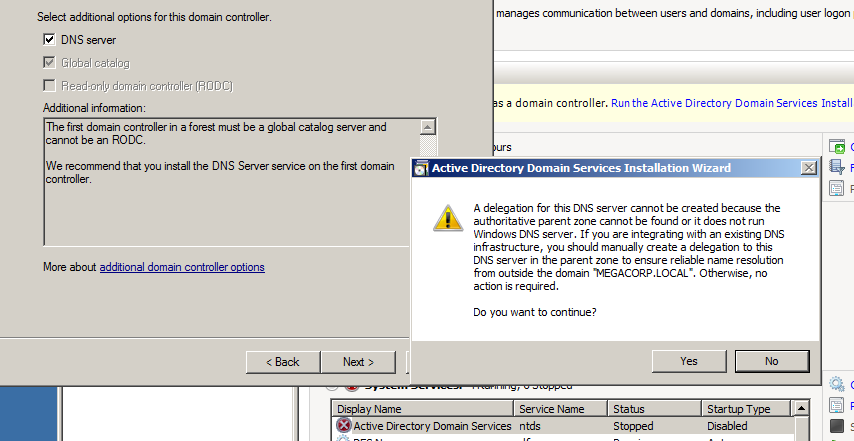
While Setting the DNS server you will see a pop-up window that will tell you something about dns server delegation, Ignore that and hit yes.
You will see some shared folders, we will go through this while configuring our vulnerable server.
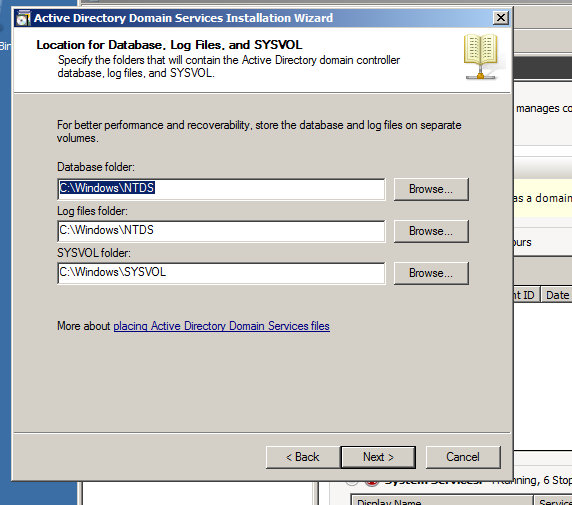
Now continue with your installation until it finish, then reboot the server.
Adding Domain Users
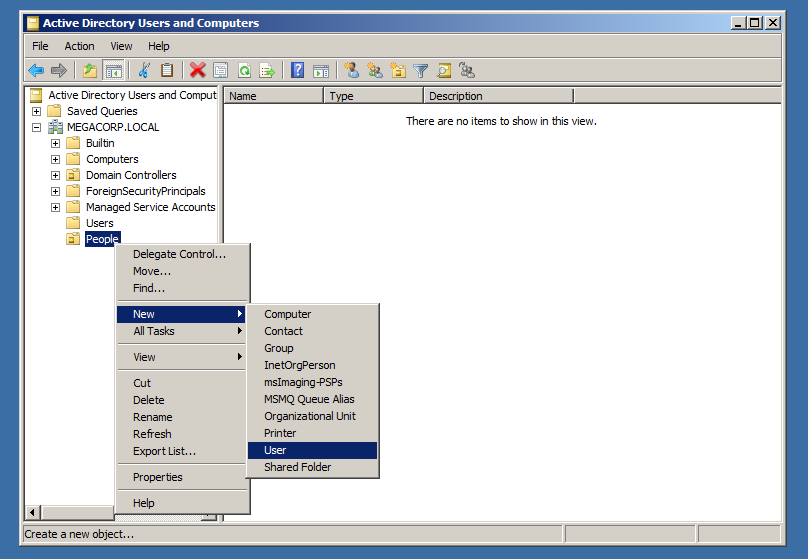
After installing the AD server we need to add a various domain users to the active directory Organizational Unit “OU” which is like a container that holds Users, Groups and Computer that joined the domain.
So we will navigate to Active Directory Users and Computers and create a new Organizational Unit, I will call it People

And adding some users to the OU.
I will add many users to the domain with a different options to the one user, my naming convention here will be the characters in the rick and morty movie, yeah why not xD.

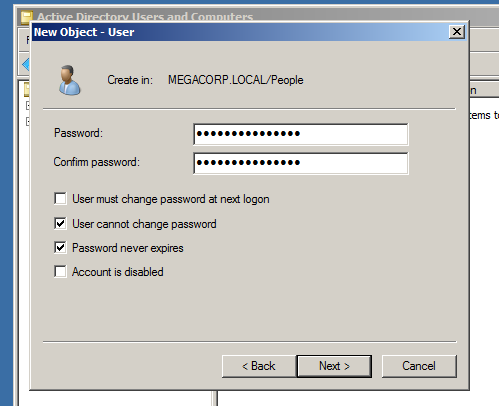
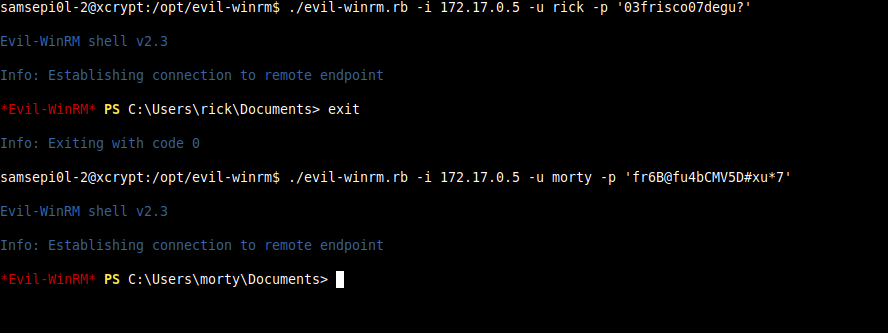
The set the password for the user, I will make his password is : 03frisco07degu? Notice that i choosed this password from rockyou.txt wordlist so we can crack his password easily while attacking the server.
Now the user rick created successfully, I will add many users to the OU with the same way.
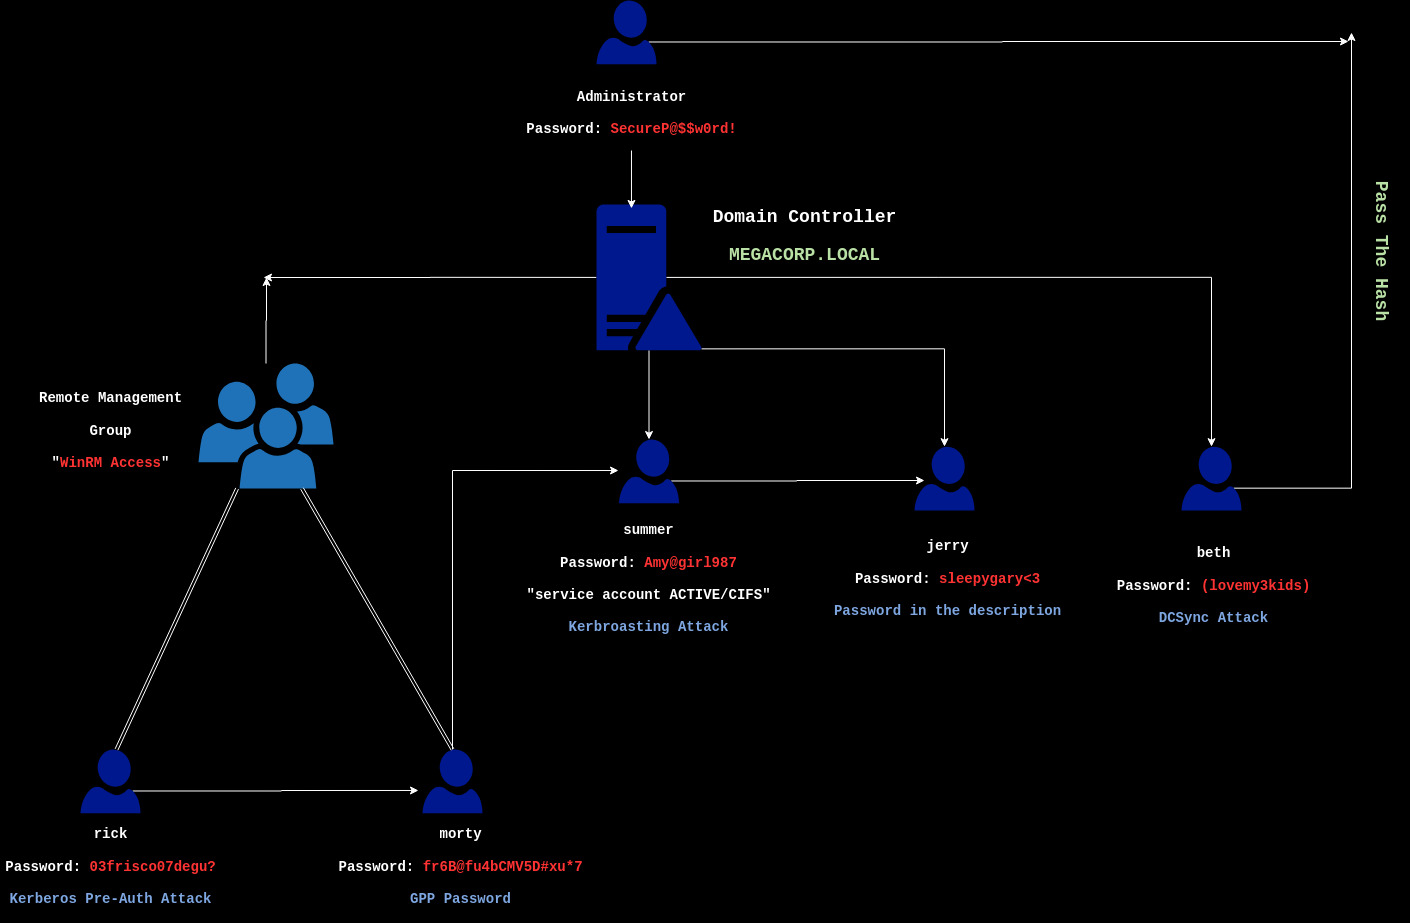
Lets Recap
So my Users and their passwords are the following:
| rick | morty | summer | jerry | beth |
|---|---|---|---|---|
| 03frisco07degu? | fr6B@fu4bCMV5D#xu*7 | Amy@girl987 | sleepygary<3 | (lovemy3kids) |
| from rockyou.txt | from rockyou.txt | from rockyou.txt |
I have choosed some passwords from rockyou.txt to be useful in our attacking later.
Configuring The Server
Now what we are going to do is configure each user for a specific attack method so lets begin.
Enabling Windows Remote Management “WinRM”
Windows Remote Management is a command-line tool which is used for server management via remote shell. In our perspective, WinRM is useful in our attacks which we could login to a some domain-joined user via remote shell.
Before going for WinRM enabling process I’ll create a group for Remote Management users which will have authorization for PS Remoting.
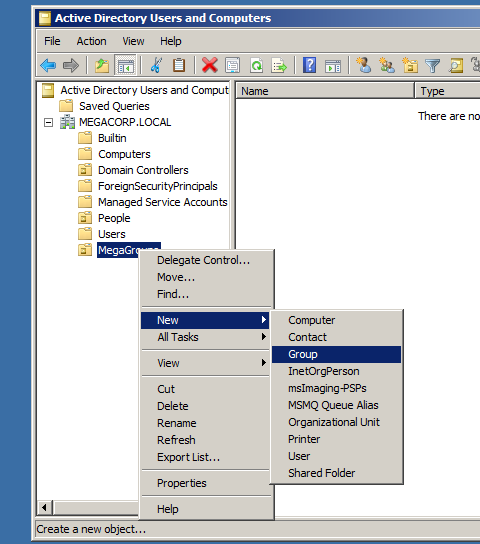
Like we did before with People OU we will create a new organizational unit called MegaGroups.

And creating a new group inside MegaGroups OU.
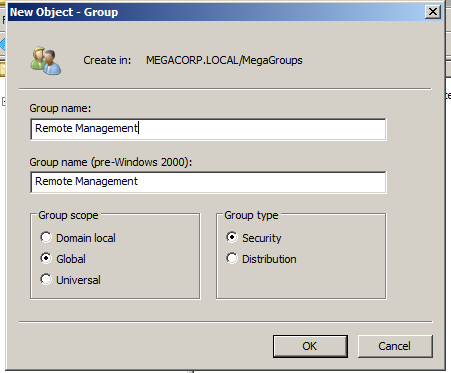
Then will call it Remote Management.
And I will add rick and morty users to Remote Management Group.
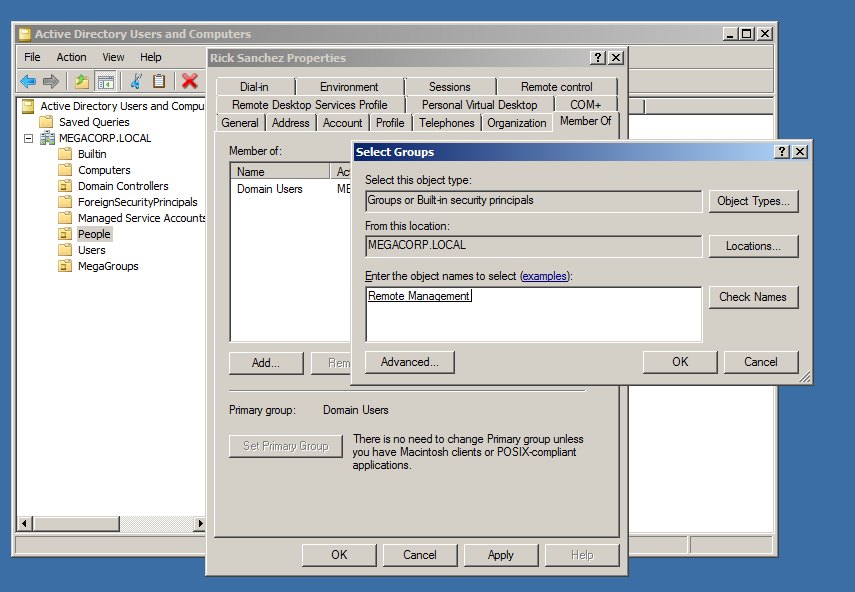
And the same with morty user.
Now lets enable WinRM by navigating to Group Policy Management and creating a GPO to the domain.
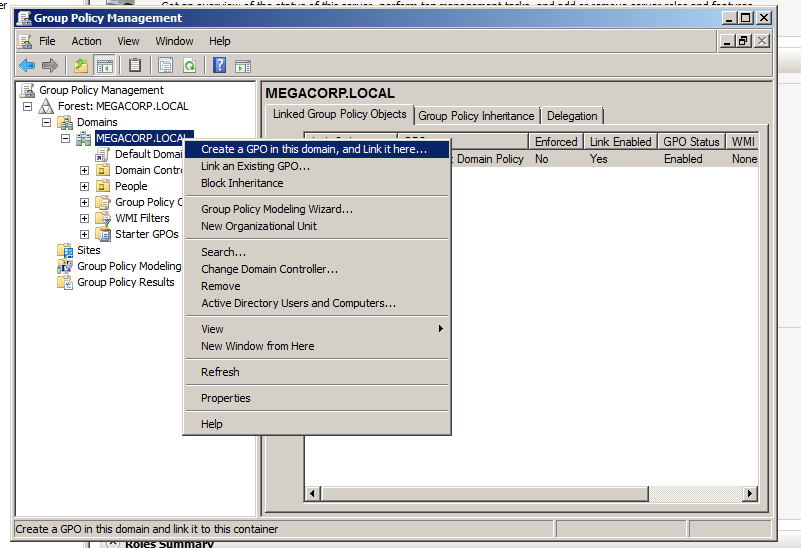
And I’ll call it Enable WinRM
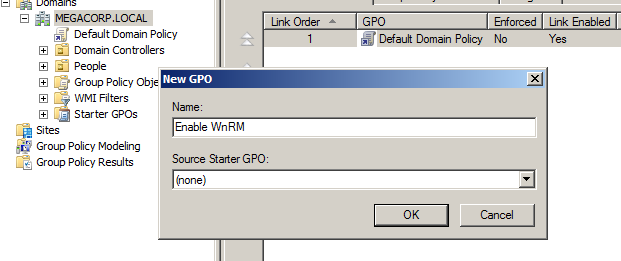
After the GPO has been created, we will edit it.
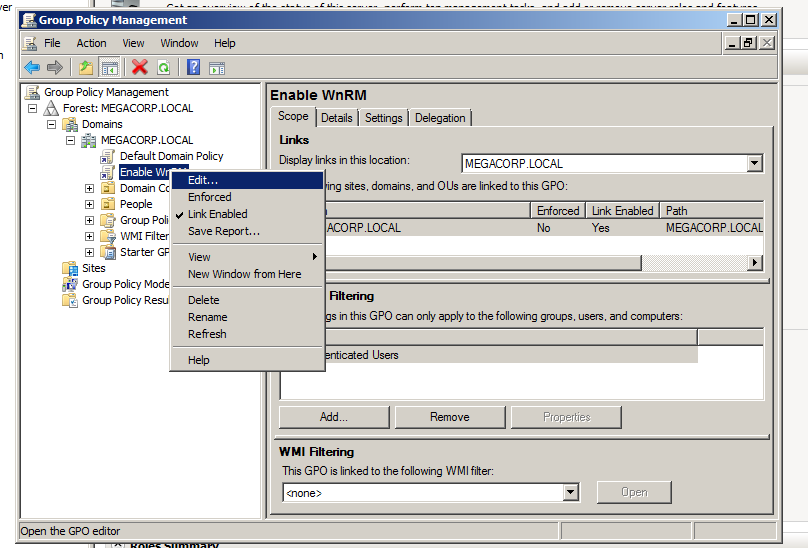
Now we need to expand and navigate to the following:
Computer Configuration > Policies > Administrative Templates > Windows Components > Windows Remote Management (WinRM) > WinRM Service
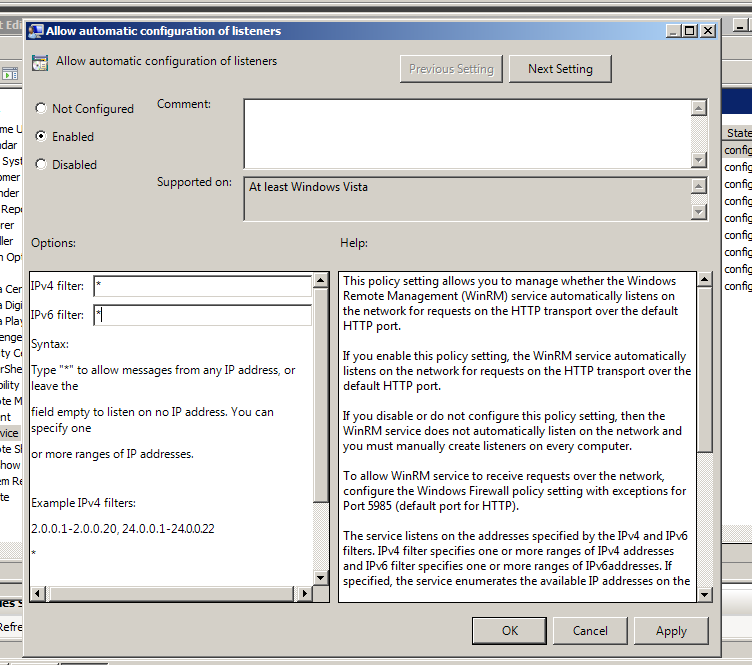
And then edit the Allow automatic configuration of listeners

Select Enabled radio button and assign an asterisk to IPv4 filter and IPv6 filter to allow messages from any IP address and hit OK.
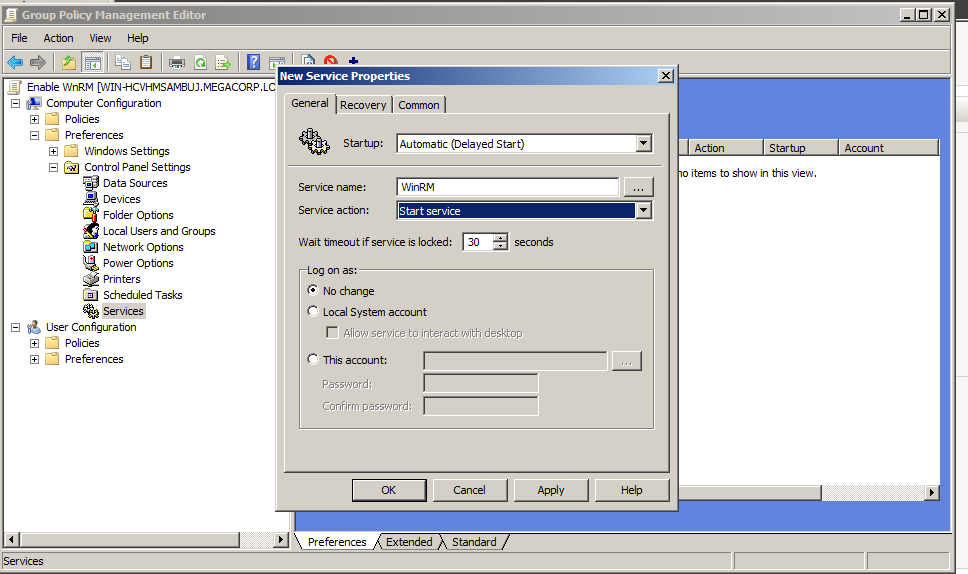
Then we need to make WinRM starts with the system, In the Group Policy Management Editor expand and navigate to:
Computer Configuration > Preferences > Control Panel Settings > Services
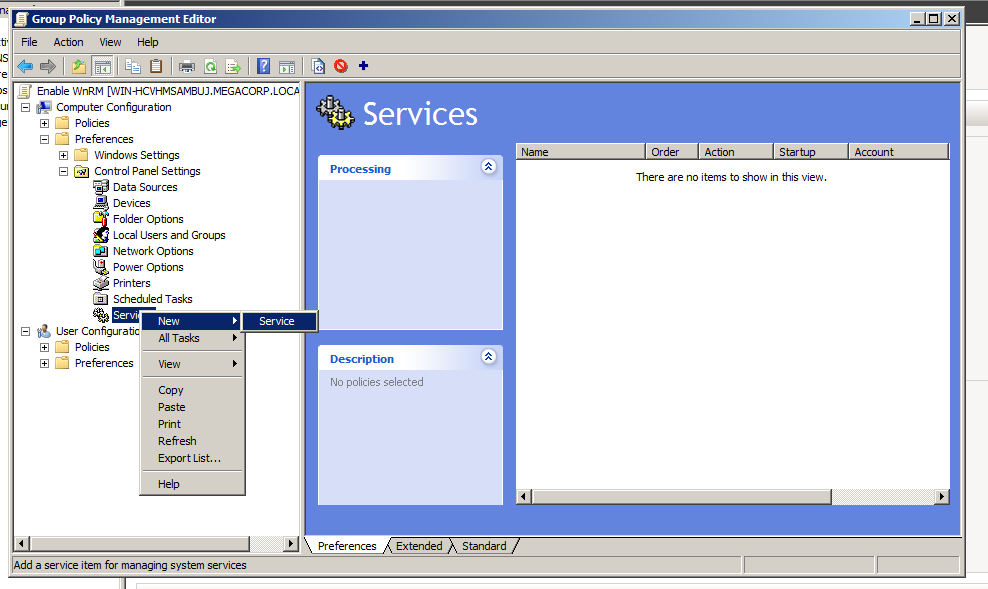
And make WinRM service start automatically.
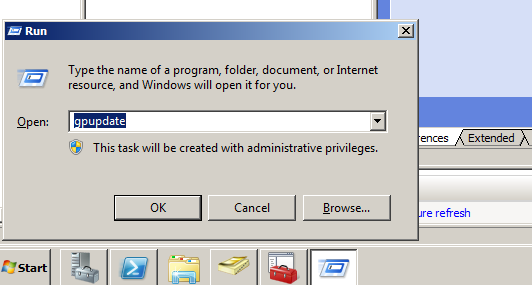
Now update the group policy object.
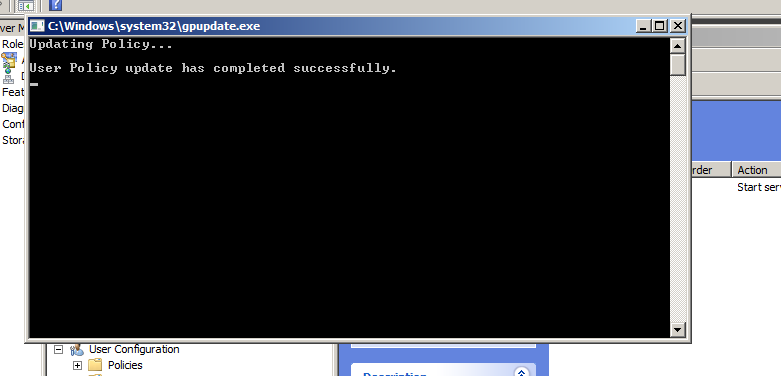
After updating the group policy the WinRM is enabled now, The server’s firewall will automatically be configured to allow the relevant traffic in.
You have to notice that not all the users could use it, so we will allow a specific users to use the Windows remote managment by opening the Powershell console and running this command.
Set-PSSessionConfiguration -Name Microsoft.Powershell -ShowSecurityDescriptorUI -Force
And add the group we created earlier on our OU.
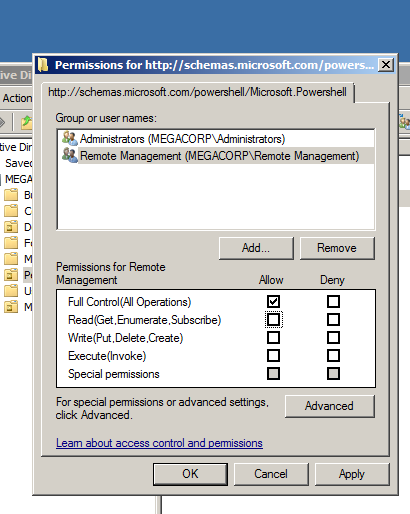
Notice : Make sure that you Allow Full Control
Then click Apply and OK, This should have enabled the WinRM for our two users.
You can check the WinRM running service by run:
winrm e winrm/config/listener
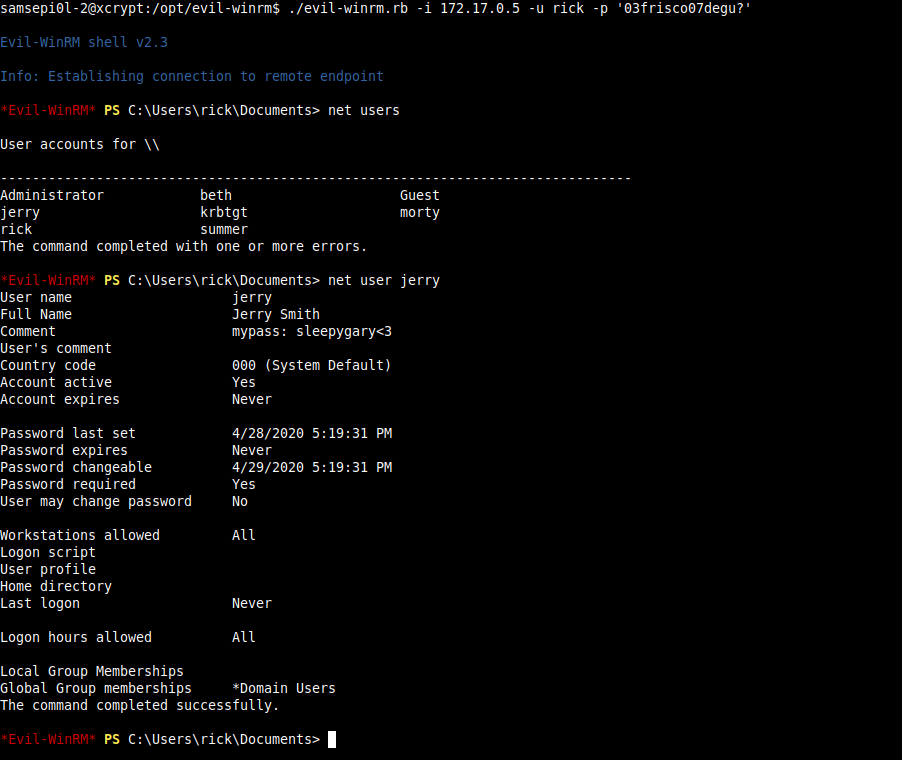
And also you can connect one of these users with Evil-Winrm from linux with the credentials you have set earlier.
LDAP Anonymous Authentication
When it came to Active Directory server, LDAP shows.
LDAP or Lightweight Directory Access Protocol is a service protocol which is like a way of speaking to Active Directory with LDAP Queries in a nutshell.
It’s very important to know about LDAP in depth, and how you enumerate it, so what we are gonna do here is to make Anonymous Authentication to LDAP without providing any credentials.
This will make LDAP enumeration easier, and LDAP Anonymous Access is very common in the wild too.
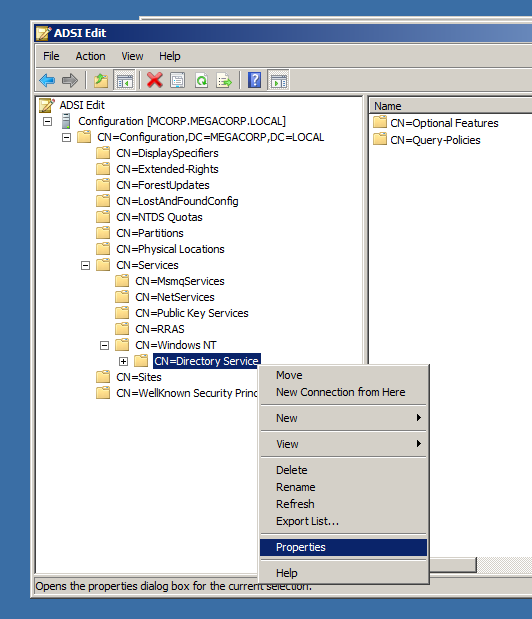
So let us enable it by opening ADSI Edit and right-click to choose Connect to…

As image above in Select a Well known Naming Context Select Configuration then press OK.
Now expand those trees like below until reach to Directory Service and click Properties.
Here in dSHeuristics attribute, change its value to 0000002 due to enable Anonymous authentication to LDAP.
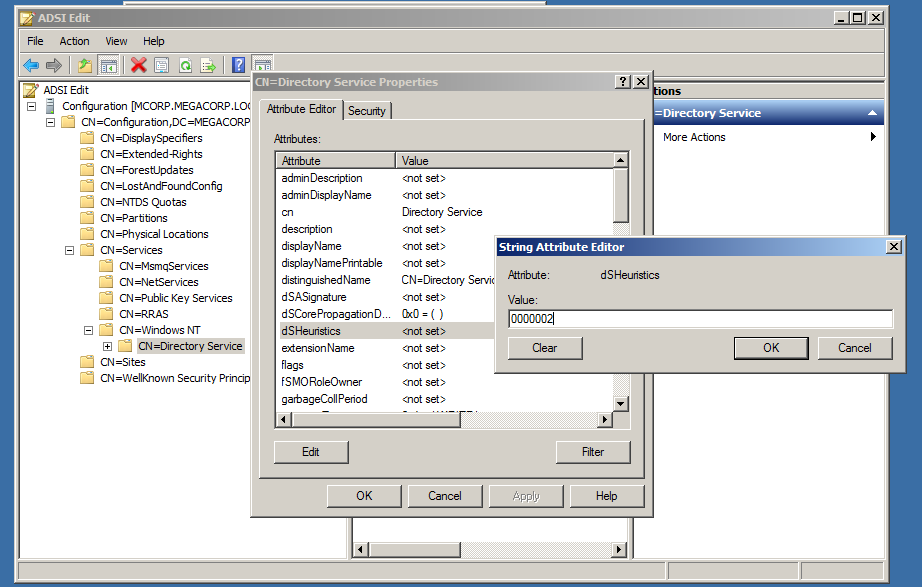
After clicking OK, You will be able to authenticate to LDAP anonymously, You will notice diffrences while enumerating LDAP with tools like ldapsearch and nmap NSEs like ldap-search.nse.
Storing Password In The User Description
A thing you might see commonly while doing a real life pentesting, Is that the sys admins might store user password in his description like down below.
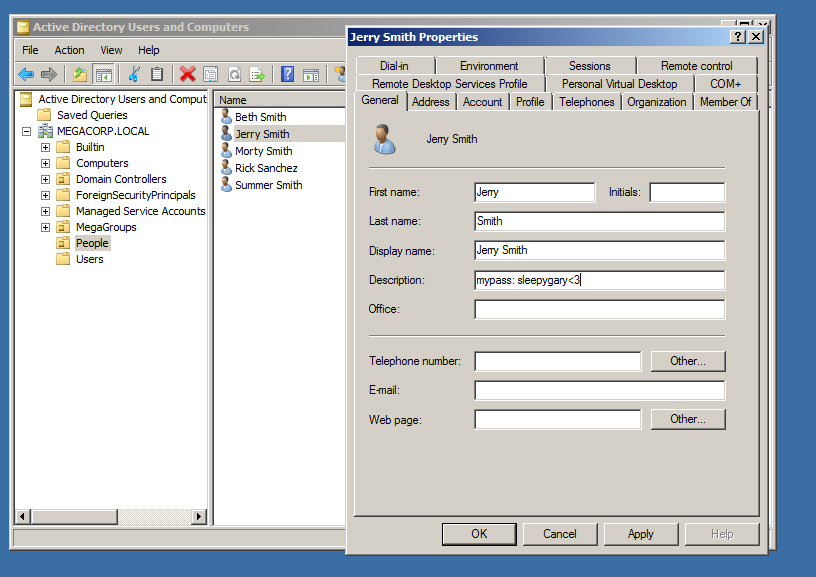
Which can any user see his password in the description and login to this user.
Group Policy Preferences Abusing
Group Policy Preferences or GPP released with windows Server 2008, Windows 7, Windows Server 2008 R2.
What is intersting about the GPP is its XML files that stored in SYSVOL shared folder, So it’s very important to check for the SYSVOL folder in SMB during the AD Domain.
Any group policy file that need to use a local or domain password stores the password in one of those XML files encrypted with AES256 encryption algorithm, The thing here is that Microsoft put the decryption key online on the Microsoft docs Here which makes it so easy to decrypt the GPP Passwords no matter how powerful the password is.
4e 99 06 e8 fc b6 6c c9 fa f4 93 10 62 0f fe e8
f4 96 e8 06 cc 05 79 90 20 9b 09 a4 33 b6 6c 1b

So to generate this will navigate to Group Policy Management and edit the Default Domain Policy Object.

Here I will add a domain user to the Local Users and Groups, I will choose morty user to new local user.
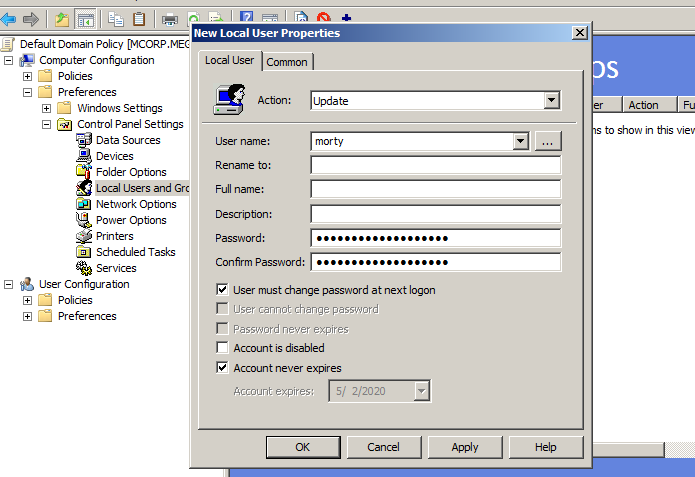
I have created it with his user account password fr6B@fu4bCMV5D#xu*7 this will be decrypted easily with the key the Microsoft provided to us.
After clicking OK, the password we have set will be store in a XML file inside SYSVOL, we can see this by navigating to C:\Windows\SYSVOL\sysvol\<DOMAIN>\Policies and search for the XML files.
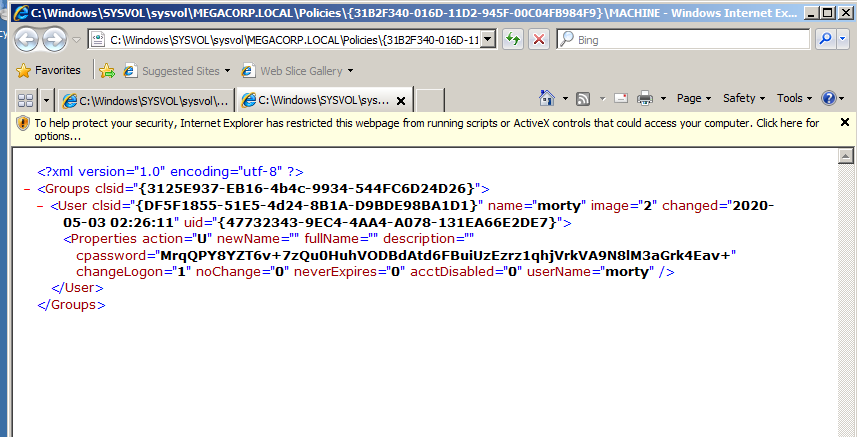
As we can see, the encrypted base64 password exist in cpassword, A lot of tools could help you to decrypt it.
KRB_AS_REP Roasting “Kerberos Pre-Authentication”
Kerberos in a nutshell is:
- A protocol for authentication
- Uses tickets to authenticate which is served by KDC
- Avoids storing passwords locally or sending them over the internet
- Involves a trusted 3rd-party
- Built on symmetric-key cryptography
And I highly recommend to read about it in depth due to understand how Kerberos protocol is working.
What we are going to do is configuring rick user for not requring kerberos preauthentication which will allow us to perform a Kerberos Pre-Authentication attack against the server.
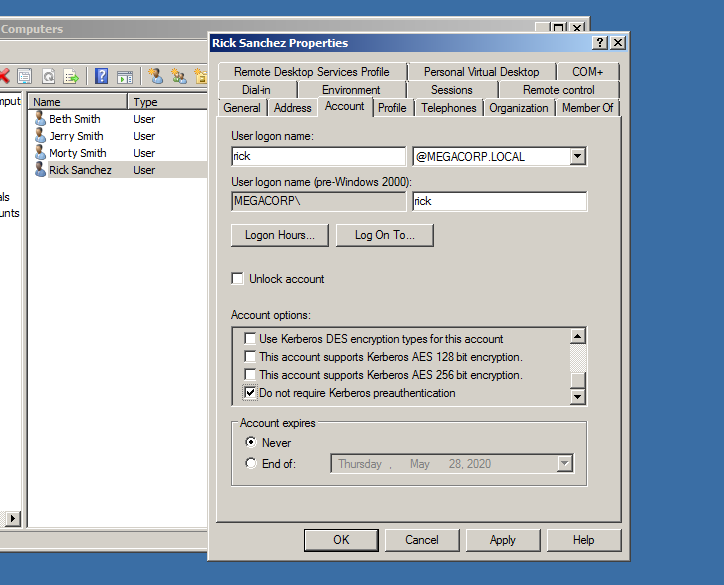
So we will be able to grab his Kerberos AS-REP ticket hash and cracking it.
Kerberoasting
The Kerberoasting attack is about requesting Kerberos service tickets TGS from authentication server, which any valid domain user can grab the TGS from a service account as a hash that we can crack it.
There is alot of good articles and blog posts about kerberoasting attack that you should go check on.
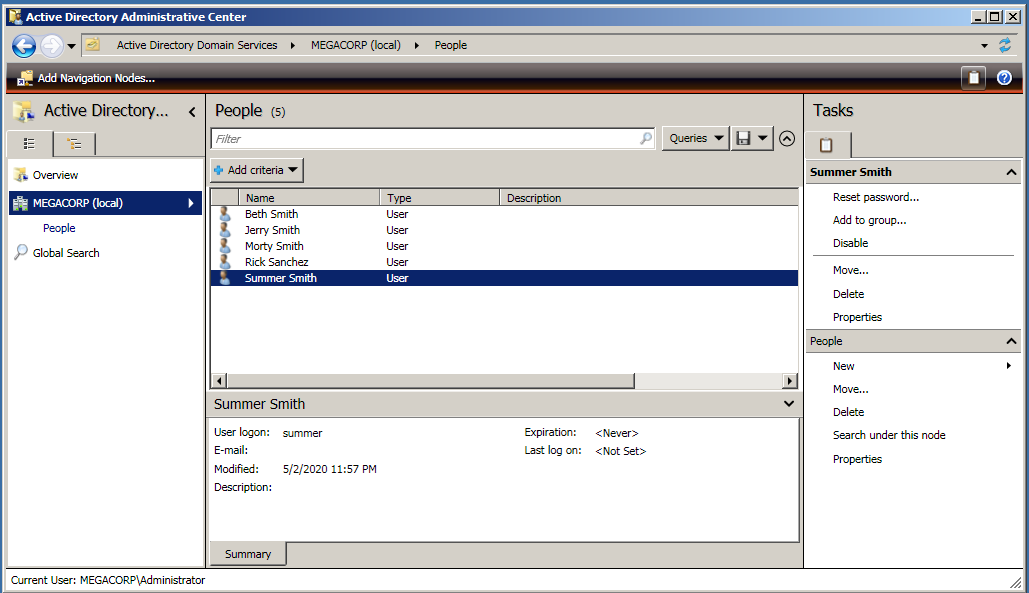
At first we will use summer domain user as a service account, It doesn’t have to be a part for real service so for the sake of this post we will create it for a fake service that doesn’t exist.
So to do this we need to open ADUC window and go to domain user summer and navigate to Properties to change the Attributes, But in Server 2008 the Attribute Editor tab doesn’t exist in the user Properties while we in ADUC, But if we go to user Properties from Active Directory Administrative Center we will see Attribute Editor tab in user Properties which exactly what we want, Yeah it’s Microsoft ¯\_( ͡• ͜ʖ ͡•)_/¯
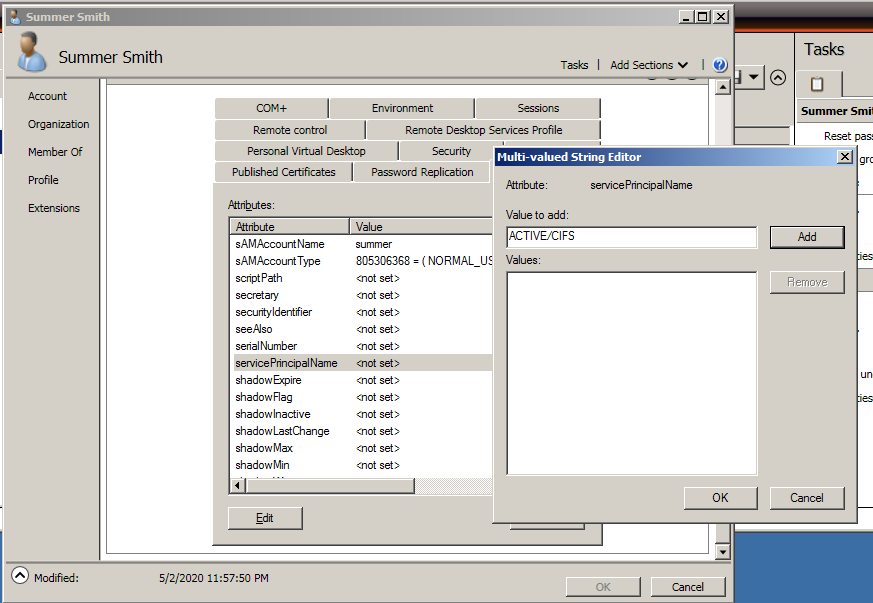
After opening properties and navigate to Attribute Editor we will have to edit servicePrincipalName attribute and give it a fake SPN for something like ACTIVE/CIFS, click Add then OK.
DCSync Attack
DCsync attack impersonates the default behavior of the Domain Controller which you can request anything from the Domain Controller including passwords, This kind of attack has its limits but very powerfull to own the entire domain.
From attacking perspective, the DCsync attack in a nutshell:
- Allow the attacker to impersonate the Domain Controller and request password hashes from the domain.
- Only accounts that have certain replication permissions with Active Directory can be targeted and used in DCSync attack.
- When you detect a possibility to perform a DCSync attack, You can grap the LM:NTLM hashes of the domain admin, and you can try to crack those hashes or performing a PTH or Pass The Hash technique to log into Administrator account.
- This attack can be performed with Impacket scripts or Mimikatz depends on you case scenario.
I highly recommended to go understand how DCSync work in depth
Lets start configuring our server to be able to perform a DCSync attack.
We will give the user beth a permission to allow Replicating Directory Changes, By opening the Active Directory Administrative Center and open the domain properties.
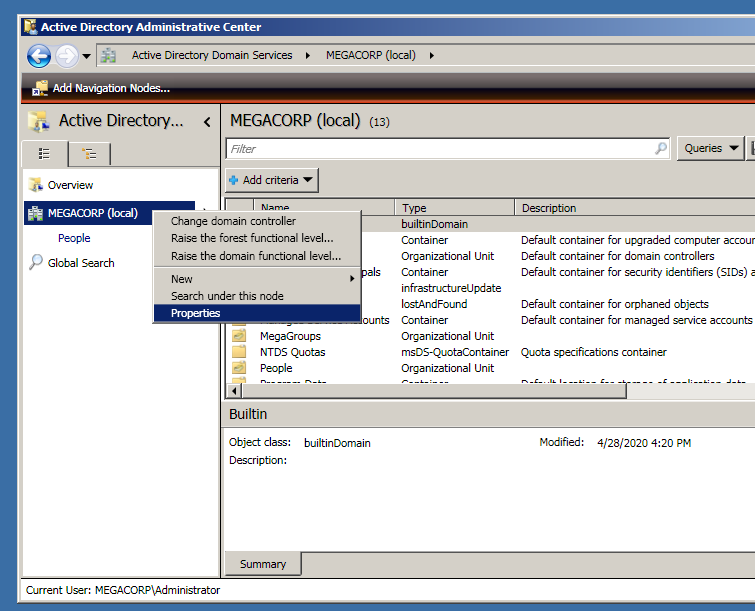
If we scroll down to Extensions and hitting Advanced in Security tab, We will see the Replicating Directory Changes permissions for the Domain Controllers, Administrators.
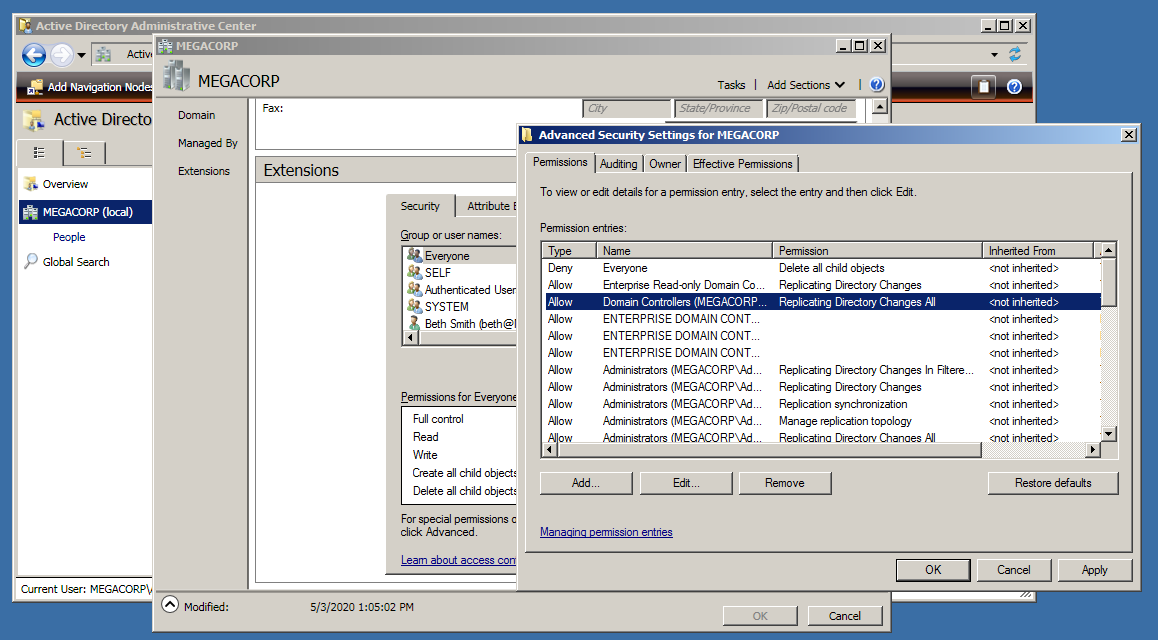
What we going to do here is giving of the domain users beth this permissions by pressing Add and type the domain username.
After hitting OK, You now allow the Replicating Directory Changes and Replicating Directory Changes All permissions.
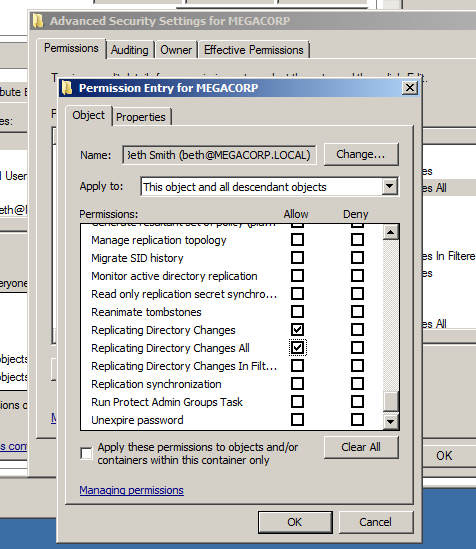
Then you will see now that beth user has the Replicating Directory Changes permissions.
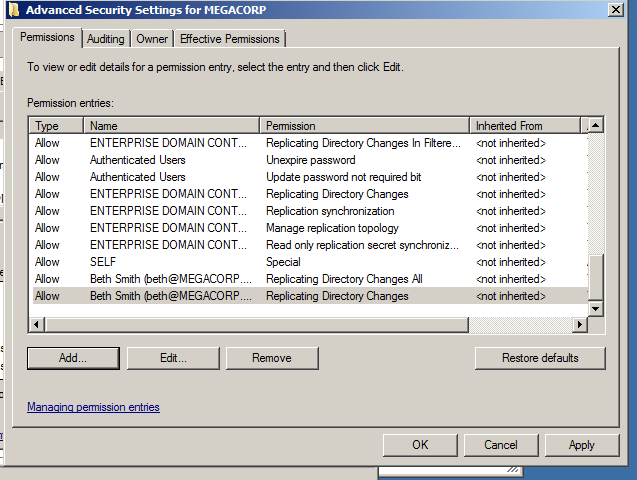
So if you enumerate this account with BloodHound or similar tool you might see that you can do DCSync attack from this account.
Lets Recap
The main structure of our server now looks like this:
Sure you can do this more way better than this, I’ll leave that you to play with it.
The Server VM we have created here VDI file will be uploaded.