If you want to build a reusable Ubuntu template for your Proxmox environment, here’s a step-by-step guide with example screenshots.
My Configurations:
- Storage name: SATA-Drive-1TB
- Network Interface: opfw_lan1
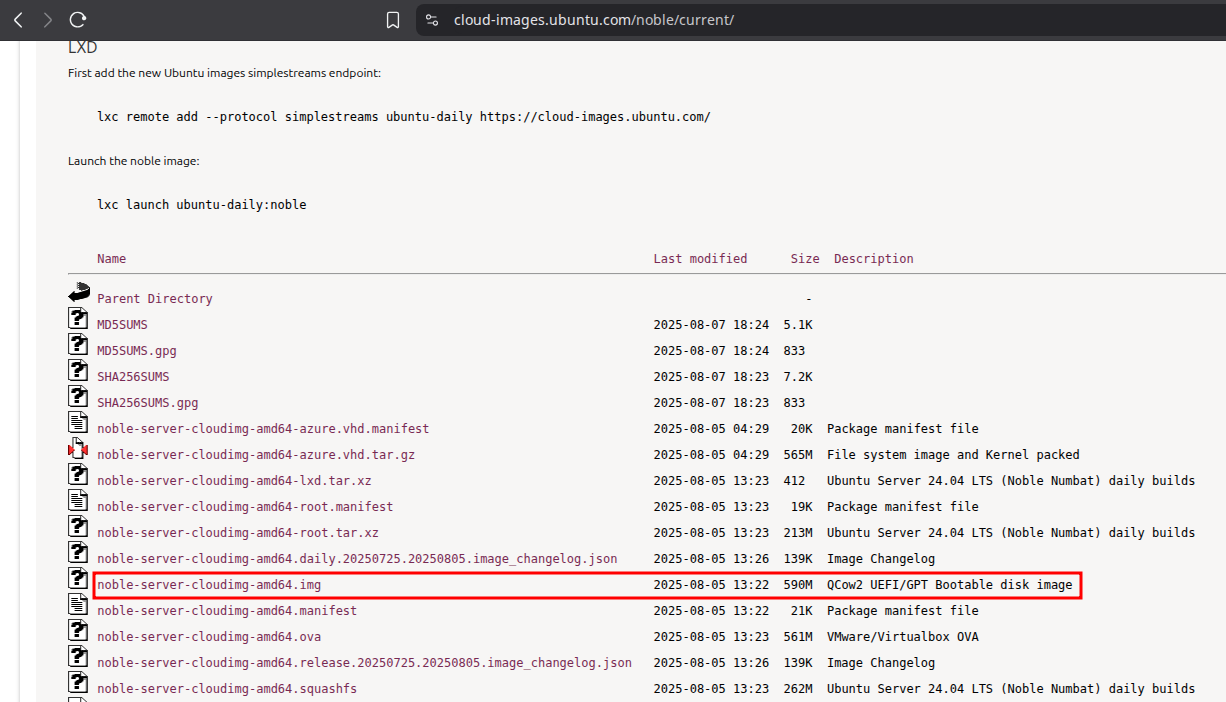
1. Download the Ubuntu Cloud Image
-
Go to https://cloud-images.ubuntu.com/ and choose the appropriate image for your use case (e.g., ubuntu-noble-server-cloudimg-amd64.img).
-
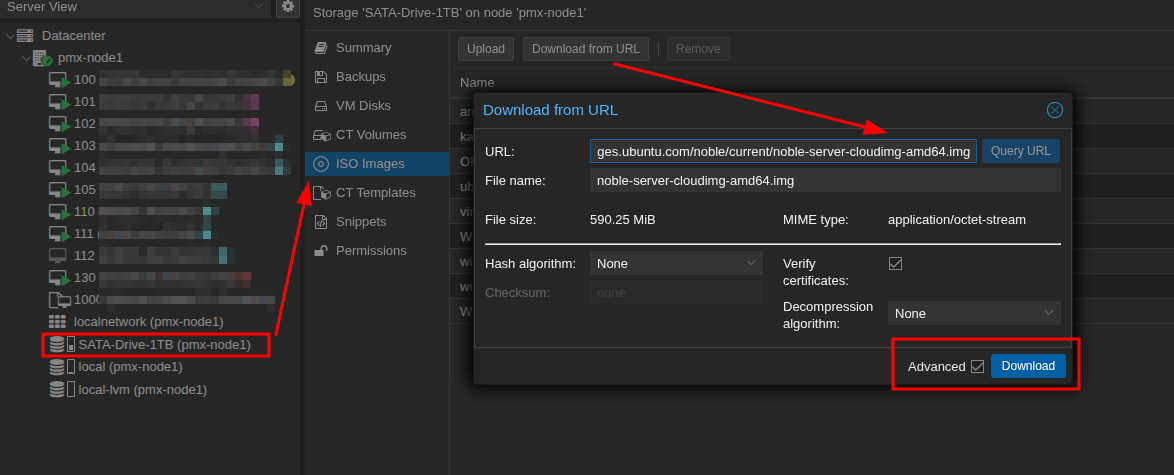
In Proxmox GUI:
- Navigate to SATA-Drive-1TB → ISO Images → Download from URL.
- Paste the URL of the selected cloud image and download it.
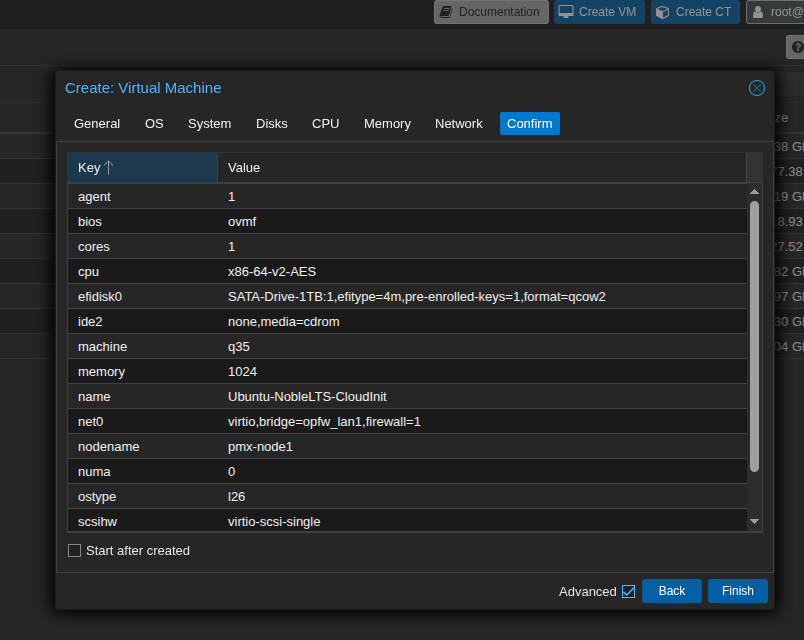
2. Create a VM for the Template
- Proxmox GUI → Create VM
- General: Set VM ID (recommended: above 1000).
- OS: Select Do not use any media.
- System:
- Machine: q35
- Qemu Agent: ✔️
- BIOS: OVMF (UEFI)
- Add EFI Disk: ✔️
- EFI Storage: SATA-Drive-1TB
- Format: QEMU image format (qcow2)
- Pre-Enroll keys: ✔️
- Disks: Remove scsi0 disk.
- CPU: Leave default.
- Memory: Set to 1024 MB.
- Network: Set Bridge to
opfw_lan1. - Create VM.
3. Remove CD/DVD Drive
- Go to VM → Hardware and remove the CD/DVD Drive.
4. Add Cloud-Init Drive
- Go to Hardware → Add → CloudInit Drive
- Storage: SATA-Drive-1TB → Add
5. Add Serial Port (optional)
- Go to Hardware → Add → Serial Port
- Select 0 → Add
6. Import Disk via Proxmox CLI
Run this command in your Proxmox shell:
qm disk import 1000 /mnt/pve/SATA-Drive-1TB/template/iso/ubuntu-noble-server-cloudimg-amd64.img SATA-Drive-1TB --format qcow2
7. Attach Imported Disk
qm set 1000 --scsihw virtio-scsi-pci --scsi0 SATA-Drive-1TB:1000/vm-1000-disk-1.qcow2
8. Configure VM and Convert to Template
- Options → Boot Order: Set scsi0 as first boot device and disable net0.
- Right-click on VM → Convert to Template → Confirm.
You can now use this template with your configuration from cloud-init without need to re-install ubuntu server each time.